Introduction and Process Overview
The SMS messaging system provides you with an intuitive system for creating and sending SMS messages to patients.
What To Do:
1. Register
for SMS.
Message transfer is managed by a third party, MessageNet, with
whom you must register
in order to send SMS messages. If you are also a Clinical user,
and have already registered
for SMS messaging via Clinical, you do not need to register
again via MedicalDirector Pracsoft.
2. Refresh
Your Appointment Book.
After successful registration, close and re-open all your Appointment
Books.
3. Configure
SMS templates.
When sending SMS messages via the Appointment
Book, you have multiple SMS message templates to base your
message on;
o Practice-wide Templates: Accessible to all Appointment Books, and all practitioners.
o Appointment-Book Specific Templates: Limited to a specific Appointment Book, accessible to a specific practitioner.
4. Configure
the SMS Scheduler.
SMS messages can be sent on-the-fly, but you can also schedule
them to be sent later, after-hours, for example. This may suit
you if traffic congestion is an issue at your practice.
5. Send
the SMS Reminder Messages.
Send SMS messages to individual patients, a selection of patients,
multiple patients in bulk lots (like doing a mail-merge, but via
SMS), or to non-patient accounts.
6. Track
SMS Message Progress.
SMS Logs allow you to track the success
or failure of messages sent, and work with those messages that
require intervention. The status
of sent SMS messages is also displayed within the Appointment
Book alongside the patient's appointment.
Before You Begin
o Ensure you have an active Internet connection. If your organisation uses a proxy server to connect to the Internet and this requires authentication, have these details ready. Please contact your System Administrator if required.
o To top-up your SMS credits, please follow the instructions on the MessageNet website here.
Initialising a New SMS Registration
o Ensure you have an active Internet connection. If your organisation uses a proxy server to connect to the Internet and this requires authentication, have these details ready. Please contact your System Administrator if required. See Configuring your proxy, below, for more information.
o MedicalDirector Pracsoft uses a third-party SMS service to send SMS messages. In order to use this SMS functionality from within Pracsoft, it is a requirement that you register your use of the service.
o Note that if you are also a Clinical user, and have already registered for SMS messaging via Clinical, you do not need to register again via MedicalDirector Pracsoft.
The Registration Process:
1. Ensure you have logged into Pracsoft as a user with a security level of 9.
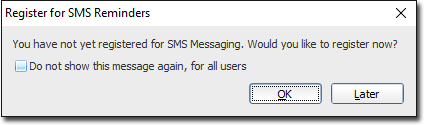
2. Upon
opening Pracsoft you will be prompted to register for SMS reminders.
Regardless of whether you had registered for SMS reminders in
a previous version of Pracsoft, you must re-register to make use
of the new service.
You can also register available via SMS > Configure SMS Account
>  button.
3. Click
 The Configure SMS Account Details
window appears.
The Configure SMS Account Details
window appears.
![]()
4. Click
The Register SMS Reminders
window appears. Register your
username and password. MessageNet recommends the following password
requirements:
o Lowercase Username (5 - 16 characters in length).
o Password can be alphanumeric and contain capitals.
o Special
characters are not permitted.

5. Enter
a new Username and Password and then click  The registration information you enter will be validated
immediately, and if invalid you will be prompted accordingly.
The registration information you enter will be validated
immediately, and if invalid you will be prompted accordingly.
6. Your Internet browser will open, and attempt to connect with the MedicalDirector Pracsoft / MessageNet web page for SMS registration. On the registration form, the Practice ID and Practice Name fields should be automatically populated with your relevant data.
7. Once
you have completed the registration form, click  You will be sent a verification
email to the email address you entered within the registration
form.
You will be sent a verification
email to the email address you entered within the registration
form.
8. Once
you have received the verification email, return to Pracsoft and
click  to verify
and save your registration information.
to verify
and save your registration information.
9. Upon
a successful verification you will be prompted accordingly.
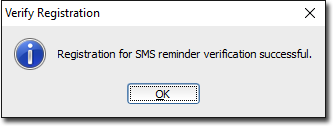
10. Click
to close the prompt.
11. (optional)
Click  to conduct a live check
of how many SMS credits your account has remaining.
to conduct a live check
of how many SMS credits your account has remaining.
12. (optional)
Click  to connect
to the MessageNet web site, and your SMS account details.
to connect
to the MessageNet web site, and your SMS account details.
13. Click
 to close the Configure SMS Account Details
window. This concludes the steps required for registering your
SMS account. Please see below for information regarding configuring
your proxy server - something that may be required for SMS messaging
to work on your network.
to close the Configure SMS Account Details
window. This concludes the steps required for registering your
SMS account. Please see below for information regarding configuring
your proxy server - something that may be required for SMS messaging
to work on your network.
Configuring your proxy in order to send scheduled SMS messages
Please consult your Systems Administrator if you require assistance with the following.
1. Locate
and double-click the MedicalDirector Maintenance icon ![]() on your desktop. The MedicalDirector
Maintenance window appears.
on your desktop. The MedicalDirector
Maintenance window appears.
2. Select
the Maintenance Tasks > Common menu item.

3. Double-click
![]()
If this is the first time you have tried to run the Network Settings
utility during this session of working in MedicalDirector Maintenance,
you will be prompted to select a Configuration, and enter your
Username and Password.
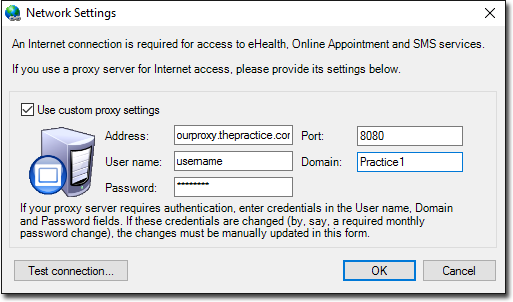
4. The
Network Settings window appears. By default the Use Custom Settings...
check box is un-ticked, and can remain so if you do not use a
proxy server to access the Internet. However, if you do use a
proxy server, tick the Use Custom Settings... check box, and then
enter your server's details. Please consult your System Administrator
if you require assistance with this.
5. Click
 to test your computer's connectivity,
based on the settings you have provided. You will be prompted
as to the success of the test.
to test your computer's connectivity,
based on the settings you have provided. You will be prompted
as to the success of the test.
6. Upon
a successful connection, click  to save the details and close the window.
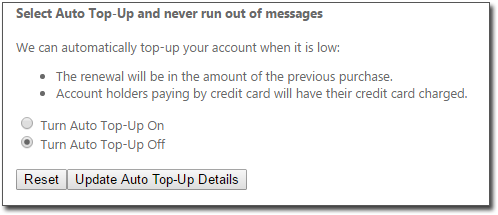
Checking Your Auto Top-Up Status
1. Ensure you have logged into Pracsoft as a user with a security level of 9.
2. Select SMS > Configure SMS Account.
3. Click
Your web browser is
opened, and you are directed to the MessageNet web site.
4. On
the MessageNet web site locate and click account details.

5. Locate
and click the Change my current rateplan link.
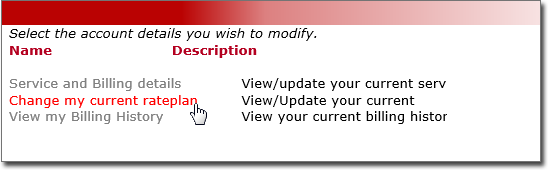 You will be redirected to the
MedicalDirector section of MessageNet.
You will be redirected to the
MedicalDirector section of MessageNet.

6. Click
the Purchase link.
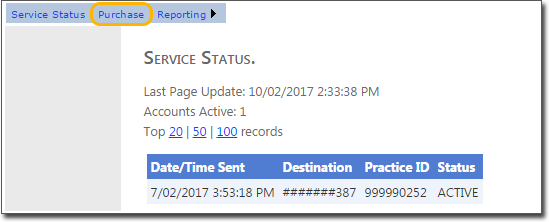 The Service Status page is displayed.
Your Auto Top-Up settings are located at the bottom of this page.
The Service Status page is displayed.
Your Auto Top-Up settings are located at the bottom of this page.