A refund generally occurs where the Practice gives money back to the patient after banking has already been finalised.
Only users with permission to write-off and refund will be able to issue refunds. Only the user profiles of 'Practice Manager' and 'Front Desk Manager' have this permission level assigned to them by default.
Refunding a Prepayment/Overpayment
1. Open the Patient's Record.
2. From the Margin Menu, select Accounts. The list of accounts is displayed.
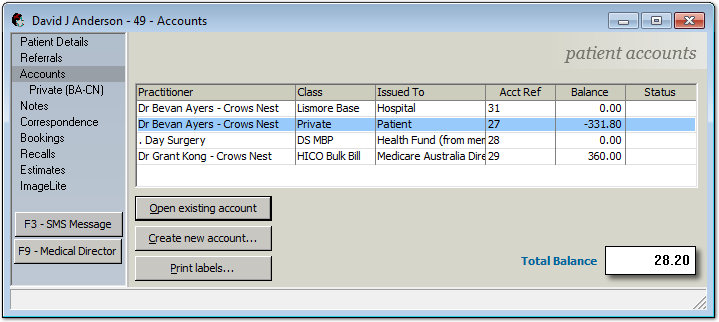
3. Select the account that requires the refund and click  The Account window appears.
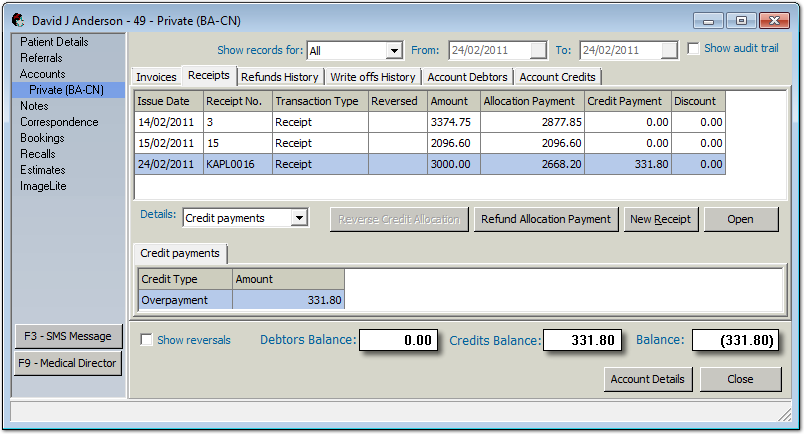
4. Select the Receipts tab. Notice in the example below, the selected receipt has a Credit Balance of $331.80. This can also be seen by selecting 'Credit Payments' from the Details drop-down list.
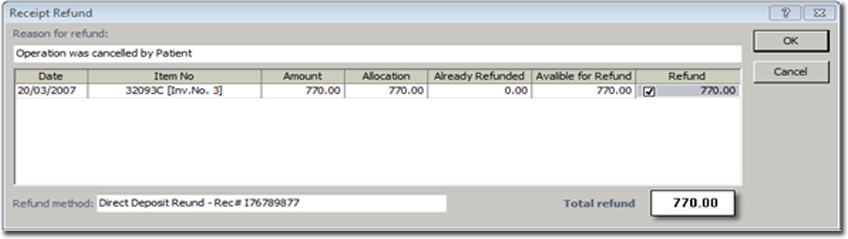
5. Click  The Receipt Refund window appears.

6. Allocate the refund to one or more items. To do this, either;
o Place a tick in the service item's associated 'refund' check box. This will refund the entire amount for the selected item.
o Manually enter an amount to refund in the service item's refund column. Once you have entered a value, the associated check box will appear ticked.
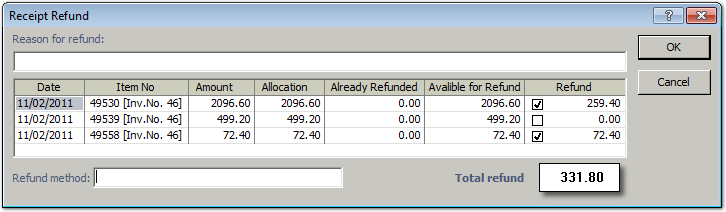
7. Also enter the following information:
o A reason for the refund.
o The method of refund.
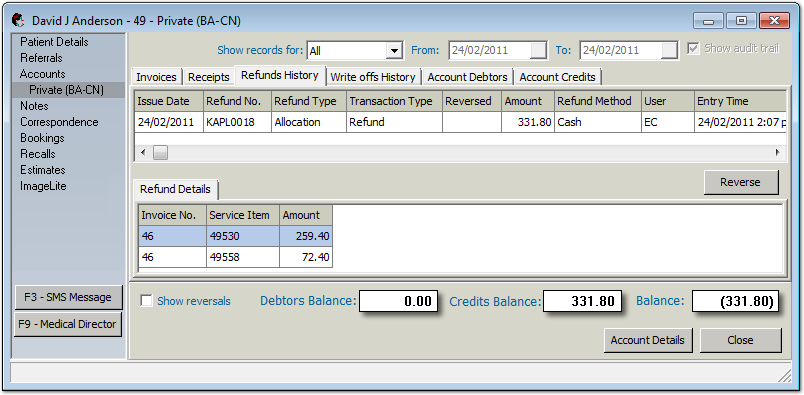
8. Click  to save the changes and close the Receipt Refund window. Within the account, select the Refunds History tab to see the refund allocation, as shown in the example below.
Refund an Allocated, Banked Invoiced
This refund process is used when the invoice and receipt has been allocated, and the receipt has been banked. The refund will generate a reverse transaction on file and allows the Practice to record the refund payment details to the patient.
1. Open the Patient's Record.
2. From the Margin Menu, select Accounts. The list of accounts is displayed.
3. Select the account that requires the refund and click The Account window appears.
4. From the Patient Details screen, access the required Account, and search for the required transactions.
Account Debtors tab
5. Due to the receipt being banked, we refund from the Receipts tab. Click the Receipt tab, and then click the Refund Allocation Payment button. This will display the Receipt Refund screen.
Note: It is imperative to enter an explanation in all open text fields (in this example reason and refund method), as this provides full details for audit purposes.
6. Enter the Reason for Refund, to allocate the Total Refund amount, and indicate the Refund Method (how the Practice is paying the refund), and then click the OK button.
Click on the Refund History tab to view the refund. The Show Audit Trail check box is selected automatically to display all details of the refund.

Due to the refund being issued after receipt being banked, there is no change to the Invoice and Receipt tabs. The refund also generates to the Banking, Refunds tab. Access Practice Explorer > Banking, select appropriate Practitioner and click on the Refunds tab in the left margin. This does not affect today’s unsettled banking.
Refund a Banked Prepayment Receipt
This refund process is used when a banked prepayment amount is on file, and the amount is to be refunded to the Patient. A prepayment shows as a Credit amount in account balances. The refund will generate a reverse transaction on file and allows the Practice to record the refund payment details to the Patient.
Patient Account Balances (bottom of screen)
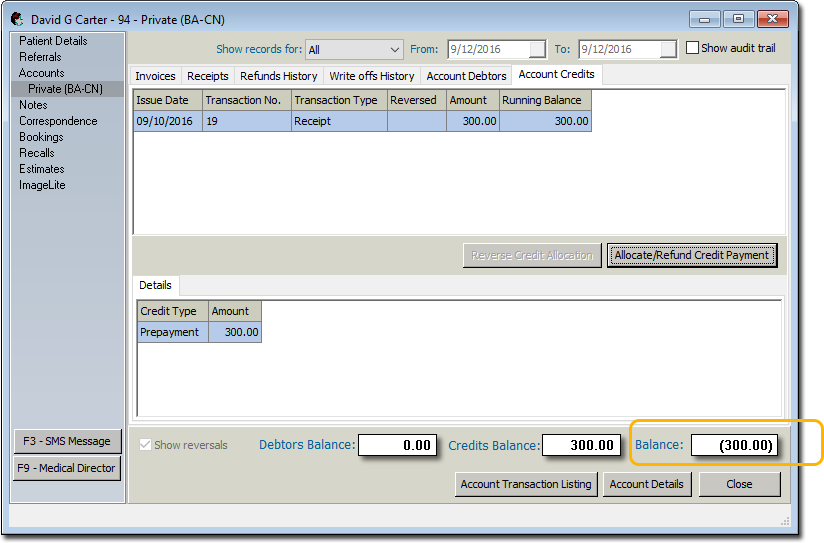
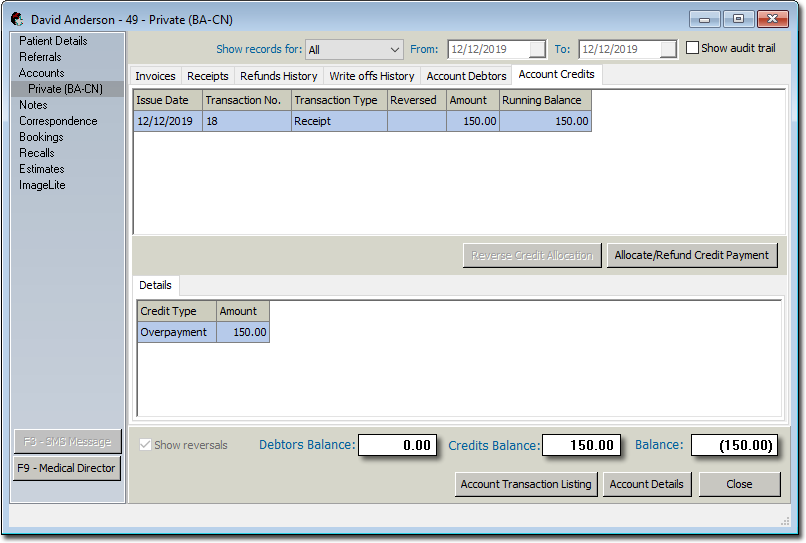
1. From the Patient Details screen, access the required Account, and then click into the Account Credits tab. This will display the receipt to the top of the screen, and the credit type details as payment to the bottom of the screen.

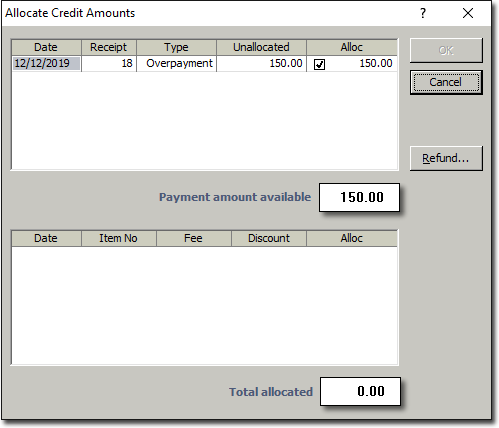
2. Click the Allocate/Refund Credit Payment button. This will display the Allocate Credit Amount screen, verifying the payment amount available.
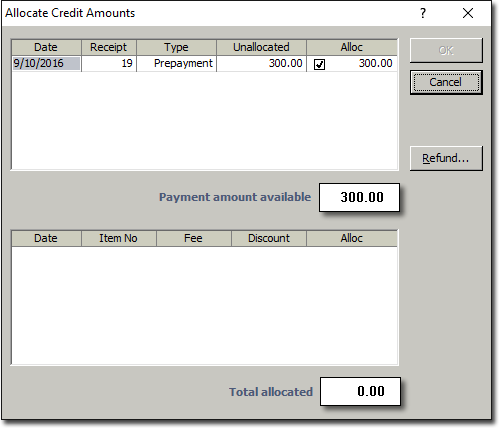
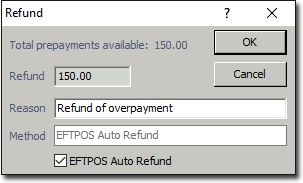
3. Click  The Refund window appears.
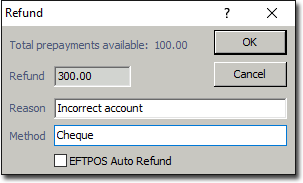
o Indicate the Reason for the refund.
o Indicate the refund Method
• For refund via EFTPOS Auto, tick the associated check box.
• For all other refund methods, enter a description
4. Click to issue the refund.
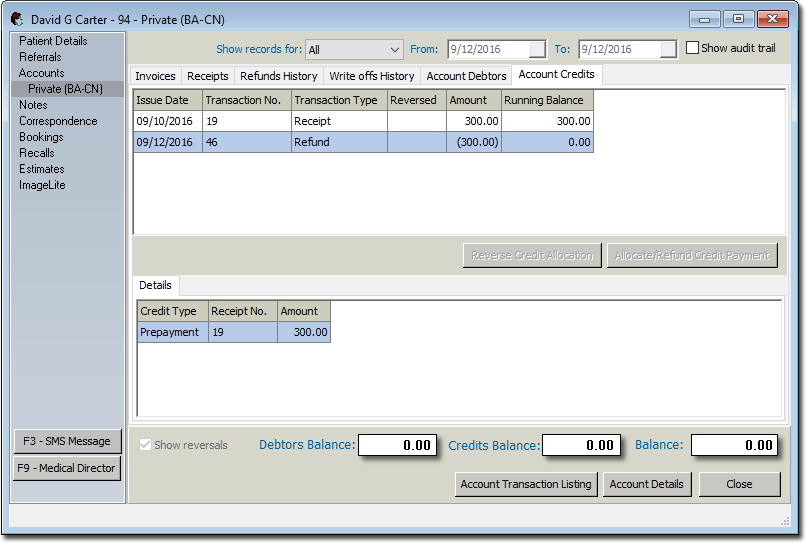
5. The Accounts Credit tab now displays the original receipt and the refund just issued recalculating both the Running Balance and the Account Balances as $0.00.
Account Credits tab
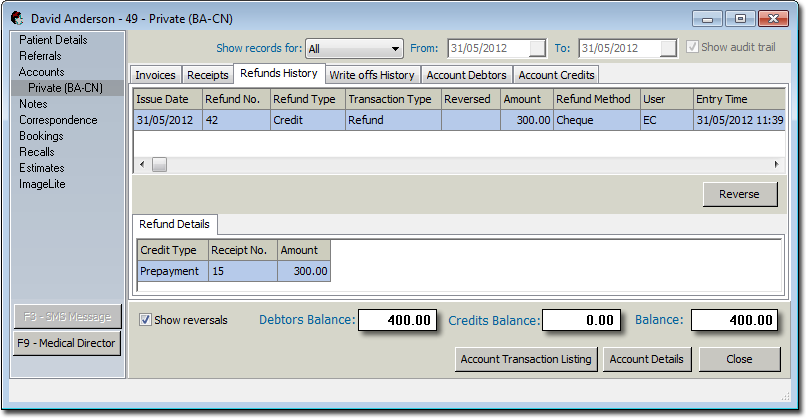
6. Still in the patient’s record, click the Refunds History tab where the refund also generates. The Show Audit Trail check box is selected automatically to display all details of the refund.
Refunds History tab

7. The refund also generates to the Banking, Refunds tab. Access Practice Explorer > Banking, select appropriate Practitioner and click the Refunds tab in the left margin. This does not affect today’s unsettled banking.
Credit Payment Refunds
In this scenario, a patient has paid a prepayment which has been banked, and the patient has changed their mind about a procedure (for example) and now wishes a refund.
2. Within the Patient Explorer, select the Accounts menu item.
3. Select an account and click
4. Select the Account Credits tab.
5. Click  The Allocate Credit Amounts window appears.
6. Click The Refund window appears.
o Indicate the Reason for the refund.
o Indicate the refund Method
• For refund via EFTPOS Auto, tick the associated check box.
• For all other refund methods, enter a description.
7. Click to confirm. You will see the refund within the Account Credits tab.
 The Refunds History tab will show the details of the refund.
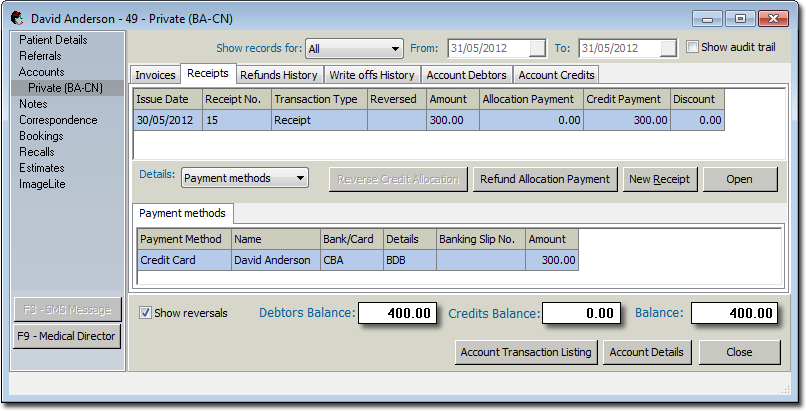
 The Receipts tab shows details of the original receipt.
 The Refunds tab in the Banking module shows details of the refund.

Details of past refunds can be listed using the Refunds Audit Trail Report.