Before You Begin
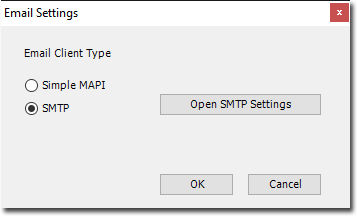
If you use SMTP for sending emails, this must be configured first in Pracsoft.
o Settings are available via Setup > Email Settings.
Select the SMTP
option, and click  to access SMTP settings. Further information on configuring
this window is available by clicking the
to access SMTP settings. Further information on configuring
this window is available by clicking the ![]() icon on the setup window.
icon on the setup window.

Emailing
Print preview windows for invoices, receipts, and statements now include a button for sending email. In the following examples we show you how to email a receipt, but the concept is the same for invoices and statements.
Via the Record Visit Window
1. During the visit click  on the Record Visit window. The receipt print-preview appears.
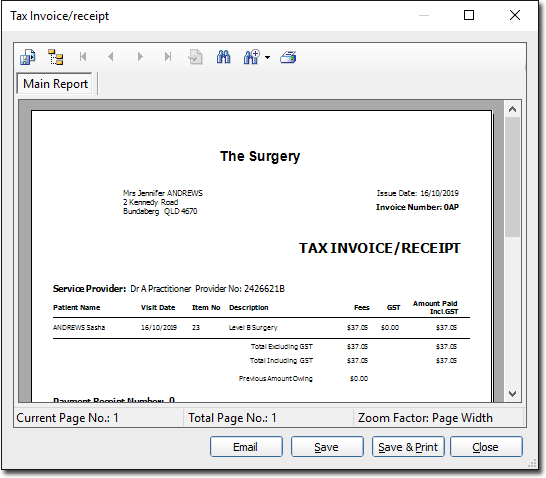
2. Click
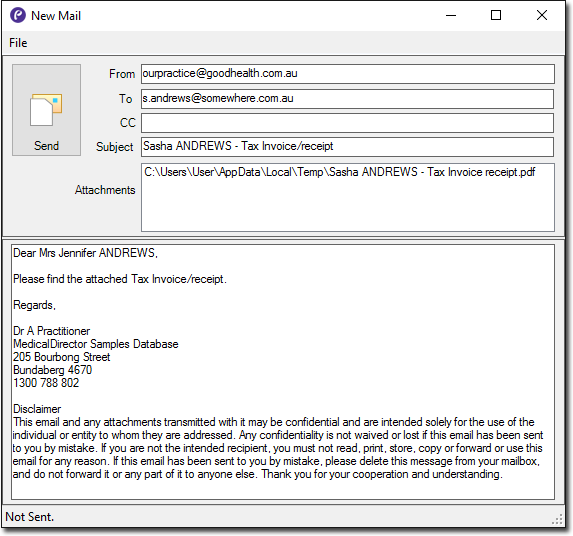
 The New
Mail window appears. Make modifications to the message
if desired, and then click
The New
Mail window appears. Make modifications to the message
if desired, and then click  when you are ready to send the email.
Via the Patient's Record
1. Locate and open the patient's record.
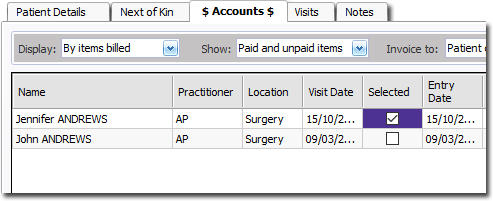
2. Within their record, locate and select the
Accounts
tab, and then select the entry you wish
to email a receipt for.
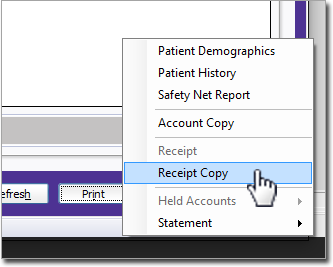
3. Locate
and click  at the bottom-right of the patient's record, and then click
Receipt Copy from
the menu that appears.
at the bottom-right of the patient's record, and then click
Receipt Copy from
the menu that appears.
4. The
print preview window appears. Locate and click The New Mail window appears.
Make modifications to the message if desired, and then click
when you are ready to send the email.
Printing a Patient's Account History
Pracsoft allows you to print a history of 'Accounts Paid' and 'Accounts Owing' for a patient.
1. Click Print
2. From
the menu that appears, select Patient
History. The Print
Patient Account History window appears.

3. Select the required criteria and click Print
Printing One-off Statements
Pracsoft allows you to print a one-off statement of all monies owing for a particular patient:
1. Click Print
2. From the menu that appears, select Statements and then either Selected on one page or Unpaid accounts. A print preview is displayed.
o Selected on one page generates a report of selected private and institutional outstanding accounts.
o Unpaid accounts generates a report that only presents outstanding private patient accounts.
3. Click Print
Printing Held Accounts
1. From the Invoice To drop-down list on the Accounts tab, select All Types.
2. Select the specific entries you wish to print by ticking the check box between the Visit Date and Entry Date columns.
3. Click Print
4. From the menu that appears, select Held Accounts > Selected (or All). A print preview is displayed.
5. Click