This topic refers to managing 'user' records in Clinical, where a 'user' is defined as any non-clinical member. For clinical staff, see Adding, Editing and Deleting Practitioners and Nurse Practitioners.
1. Select
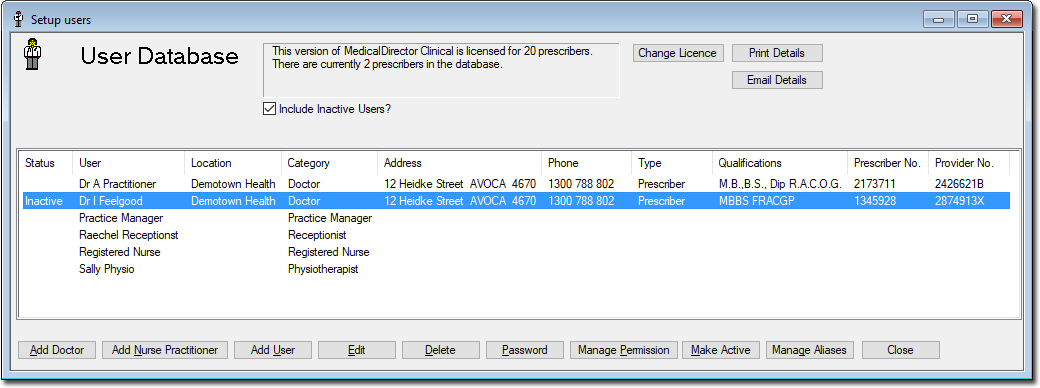
Users > Setup Users from the Clinical main
screen to open the User Database.
2. Click
Add User The
Add User
window appears.

3. Enter the name of the user - this would normally be the user's First name then Surname.
4. Indicate the user's practice location.
5. Select
one of the options from the Category
list. Common categories are listed, and you can manage user-defined
categories via the  button.
Note that if you select 'Medical Student', you can also indicate
who is the supervising practitioners.
button.
Note that if you select 'Medical Student', you can also indicate
who is the supervising practitioners.
6. Select one of the Access Level options.
7. Options:
o If you have selected an Access Level of 'Full', you may now also;
• Record the user's Provider Number for Medicare Australia Immunisations,
• Record the user's HPI-I No,
• Indicate that you wish to participate in My Health Record, and then record your details as you wish them to appear in the My Health Record system.
o Indicate whether this user should have Data Export Privileges.
o Tick the Options Editing check box if you wish to give the user access to the Clinical Options and Print Options menus.
o Tick the PKI Encryption check box to enable the encrypting of e-mail correspondence sent from Clinical Letter Writer using HESA PKI Certificate encryption technology.
o Tick the Auto-Capitalise Name check box to automatically capitalise the first letter of each word you type. There are numerous windows throughout Clinical that offer this functionality, including the various Options tabs. The status of this Auto-Capitalise Name check box determines the default for all others.
o Tick the MyHealthRecord Assisted Registration check box to indicate that this users can access the MyHealthRecord Assisted Registration utility.
o Tick the Participate in Deidentified OneNil Patient Data Set Collection check box if you wish this user to opt-in or opt-out of OneNil data collection.
8. Click
OK to
add the new user to the database. At this point you are prompted
to enter a new password.

9. Devise a password, entering and confirming it in the fields provided. Multiple users can share the same user name. For further information about passwords, see Setting and Changing Your Password.
10. Click Save to confirm your password choice and save the record.
11. Consider configuring the user's permissions.