1. Ensure you have already;
o Configured Bluechip for IMC via ECLIPSE.
o Created an Account specifically for invoicing Inpatient Medical Claims.
o Entered the patient's Medicare Card number.
2. Open the patient's record.
3. From the Bluechip Margin Menu, select Accounts. The list of accounts is displayed.
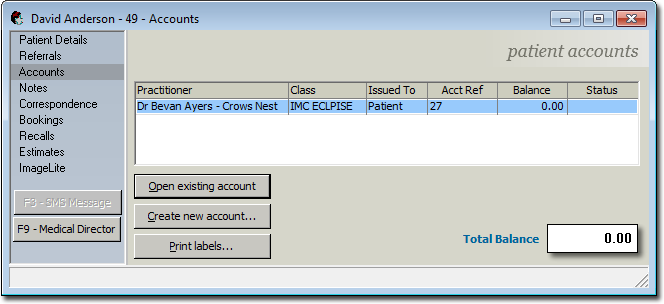
4. Select the IMC Claiming account you wish to create an invoice for, and click  You are presented with the details of the account.
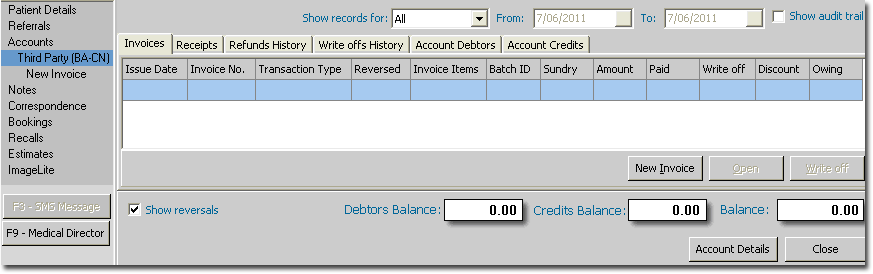
5. Click 
At this time you may be prompted to verify the patient if you have not previously done so. Patient verification ensures that claims can be made for bona fide patients. You will be asked to select the patient's Servicing Practitioner, and then to click  to initiate the verification process. Alternatively you can ignore the verification process for now.
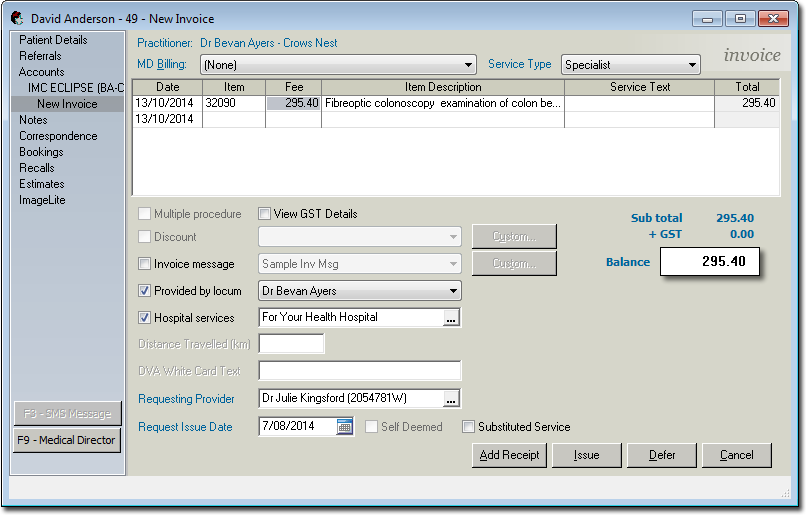
The New Invoice window appears.
to initiate the verification process. Alternatively you can ignore the verification process for now.
The New Invoice window appears.

6. (Optional) The Date field in the Invoice window is automatically set to the current date. Adjust this if necessary to reflect the date on which the service was provided. Press Enter to move to the Item field.
7. Enter a service item number in the Item field. If you are not sure of the number, you can search for it.
8. After entering a service item number, press the Tab key. The Duplicate Item Number window appears.
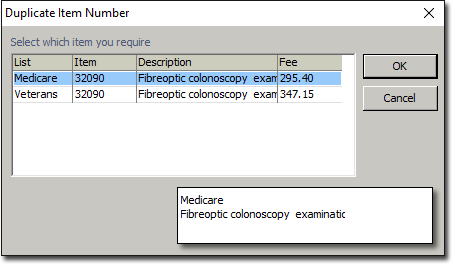
o From this window, select which Health Fund you wish to invoice the service item to. Click to continue.
o Continue to add further service items as necessary.
9. Once you have finished adding service items, tick the Hospital Services check box at the bottom of the New Invoice window, and then click the  button to select a hospital to record the invoice against.
10. Other options:
o To modify the description double-click in anywhere in the Item Description field and move the cursor to the point where you wish to begin editing
o You can change the fee for a given service item or you can setup standard fees, based on the class of patient and the Practitioner whose service is being billed.
o You can add multiple items to the same invoice. If you accidentally start adding an extra line to the invoice, highlight any field on that line and press Ctrl+Delete.
o GST details can be viewed by enabling the View GST Details check box.
o Print a message on the invoice by enabling the Invoice Message check box. You can then select from any pre-defined messages you have or modify a message by clicking the corresponding Custom button.
o Indicate that the service was performed by a locum, and select the locum.
o Indicate that the service was performed in-hospital, and select the hospital via the button.
o For Specialist and Pathology service types;
• Indicate that the service was requested by a specific provider, selecting the provider via the button, and
• Indicate the date the request was issued.
o Indicate if the service was self-deemed via the associated check box.
o Indicate if the service was a substituted service.
11. When you are ready, you may submit the invoice.