You can edit the Appointment Book to indicate the availability of each HCP at your practice.
Note that the following procedure can be performed only by non-clinical staff.
Accessing Appointment Book Settings for a Specific User
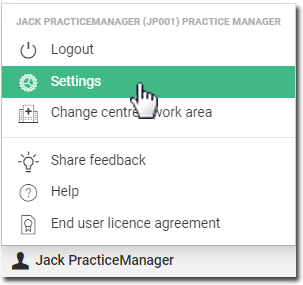
1. Locate and click ![]() at the lower-left.
at the lower-left.
2. Select the Settings option.
The Settings window appears.
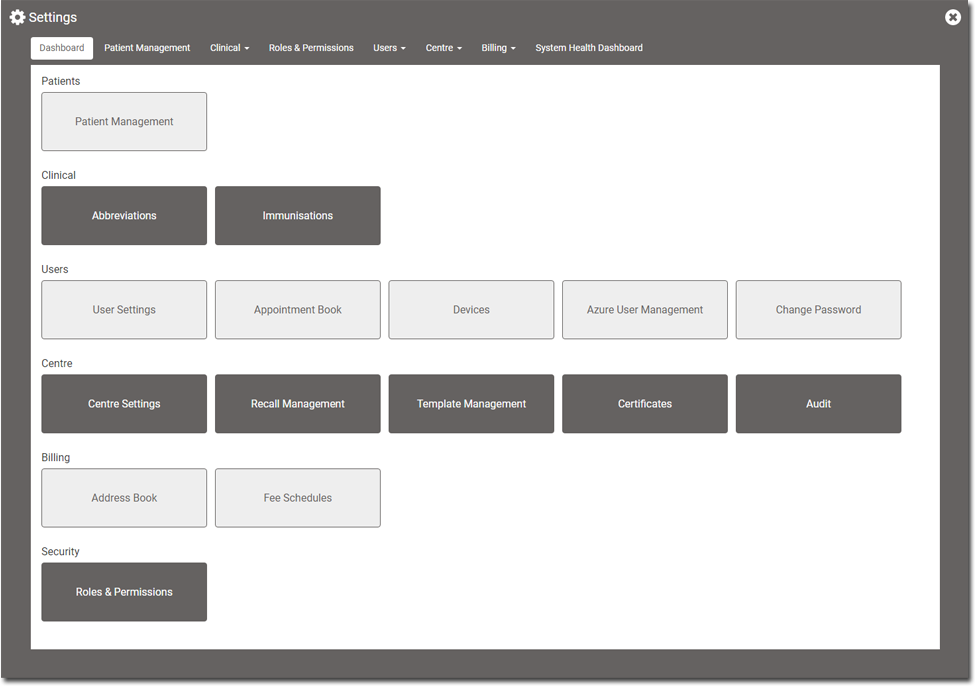
3. To access the Appointment Book, either;
o Select Users > Appointment Book.
o Click 
The Appointment Book Set-up window appears.

4. Select a Centre, Work Area, and HCP. You now have access to the appointment settings for the selected HCP.
Setting the HCP's Available Times
1. Ensure you are viewing the Appointment Book settings for the HCP whose timetable you wish to edit.
2. Locate the Available Times section.
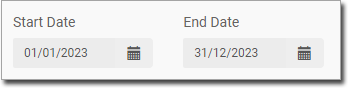
3. Enter a Start Date and End Date for this period of available times.
o You can create multiple periods, all with their own settings.
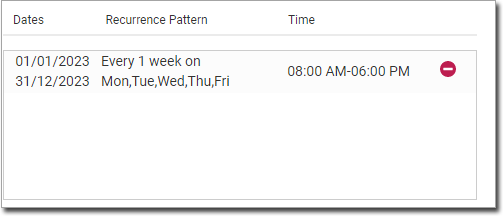
4. Indicate how often this time-table will occur.
o In the example below, we have indicated it will occur every weekday, every week.

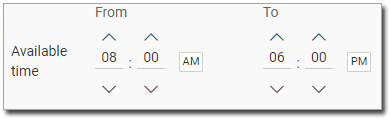
5. Indicate the time span the HCP is available for.
o Our HCP is present from 8:00 am to 6:00 pm.
o Do not take into account any breaks the HCP might have - you will record these next.
6. Indicate any breaks the HCP has within the available period, and the duration of each.
o Our HCP will break from 11:30 am to 12:30 pm.
o Click  to add the break. If you do not click this, the break will not be recorded.
o If the HCP takes multiple breaks during the day, record each, separately.

7. Click  to record this schedule.
8. Click  to confirm the changes.
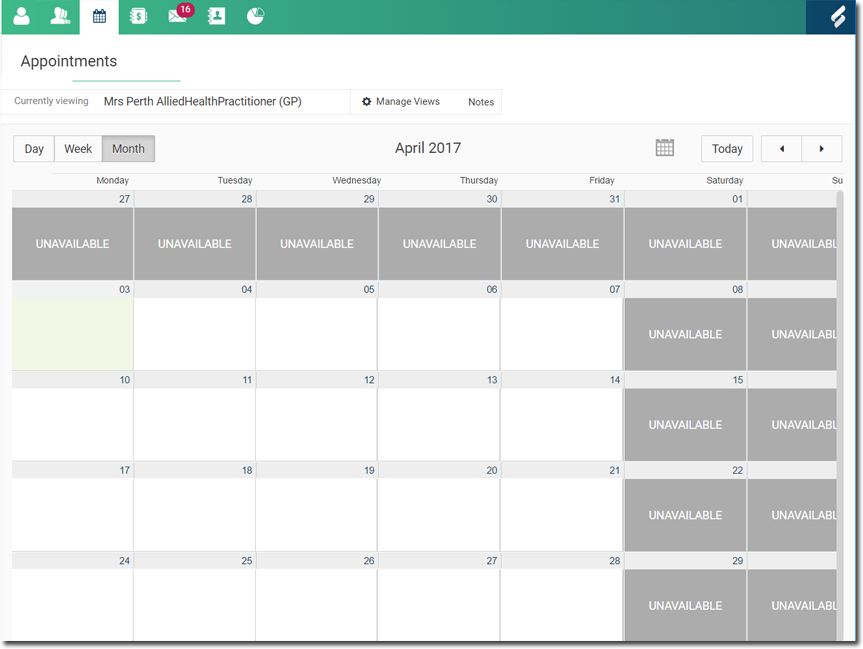
You will see this schedule reflected in the Appointment Book for this HCP.
Setting the HCP's Personal/Additional Days Off
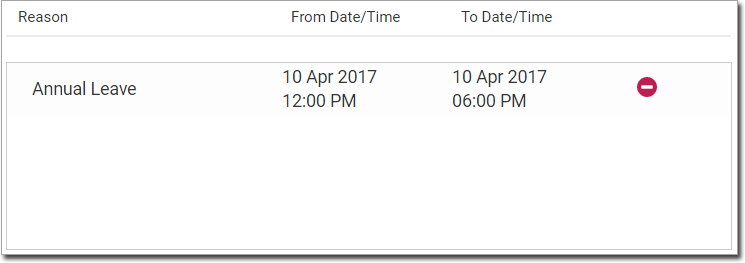
In our example, the HCP wishes to schedule some annual leave.
o She wants to take a Friday afternoon off, followed by an additional two full weeks.
o We will record the partial day first (for the Friday afternoon).
o Then we will record the following full two-week period.
1. Ensure you are viewing the Appointment Book settings for the HCP whose timetable you wish to edit.
2. Locate the Personal/Additional Days Off section.
3. Enter a reason for the leave.

4. Indicate the date of the partial day, recording that date into both the From and To fields.

5. For the partial day off, indicate the Start and End times.
o The Start time is the time at which the HCP will start her holidays.
o The end time is generally the same time she normally leaves for the day. Our HCP is leaving at midday. She normally finishes work at 6 p.m., so we have recorded this accordingly.

6. Click  The scheduled personal days off are saved.
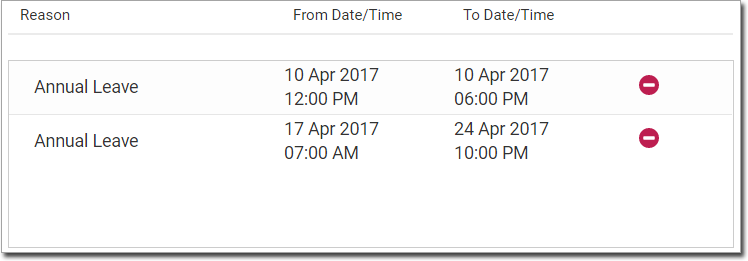
Now we will record the full two-weeks extra...
7. Enter the reason for leave again.
8. In the From Date and To Date fields, enter the leave period, from the HCP's first day of leave until their last.
9. The From Time and To Time fields can be left blank. Helix will assume the default practice hours, and record them for you.
10. Click The additional scheduled personal days are saved.
11. Click to confirm the changes.
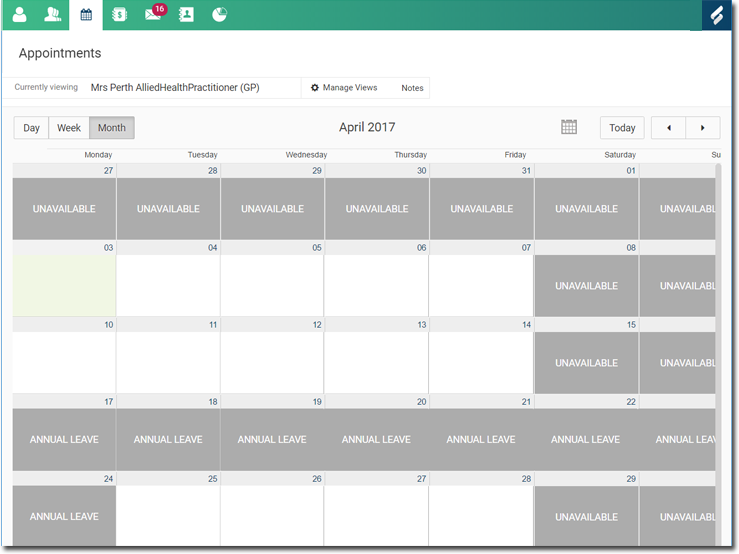
You will see this schedule reflected in the Appointment Book for this HCP.
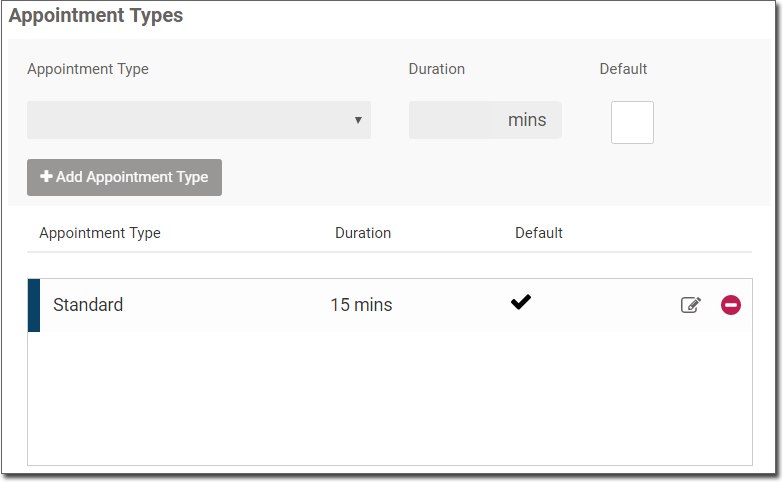
Configuring Appointment Types
Helix provides 11 different appointment types, with the default type of 'standard' appointment.
By managing these 11 different appointment types, you can;
1. Ensure you are viewing the Appointment Book settings for the HCP whose timetable you wish to edit.
2. Locate the Appointment Types section.
o The upper section of this window provides for configuring a new appointment type.
o The lower section of this window lists the appointment types available to the selected HCP. Note that the 'Standard' appointment is the default.
3. Via the Appointment Type drop-down list, select an appointment type to configure. We have chosen 'Health Assessment'.
o Indicate the default duration (in minutes) for this appointment type. Whenever you schedule an appointment of this type, the appointment's duration will default to what you specify here.
o Indicate whether this is to be considered the default appointment type for the selected HCP.
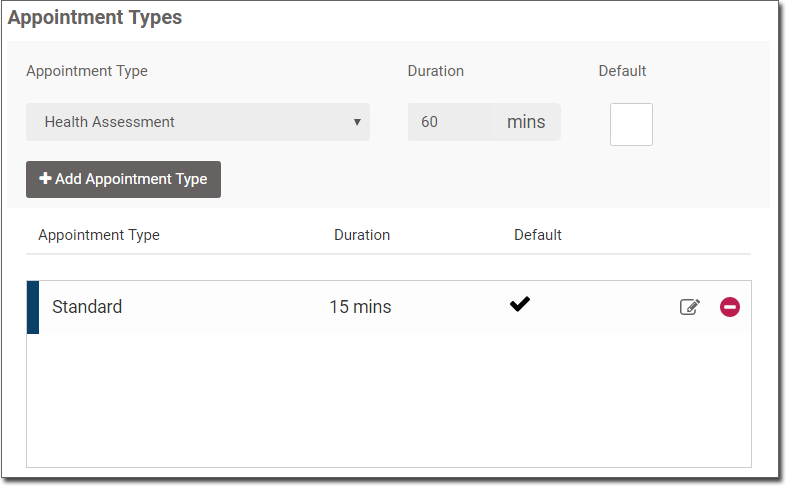
4. Click  to add the new appointment type configuration to the list of appointment types in the lower section of the window.
o You can edit an appointment type by clicking 
o Note that each variation of appointment type is colour-coded. These colours appear in the Appointment Book, allowing you to easily differentiate between appointment types.
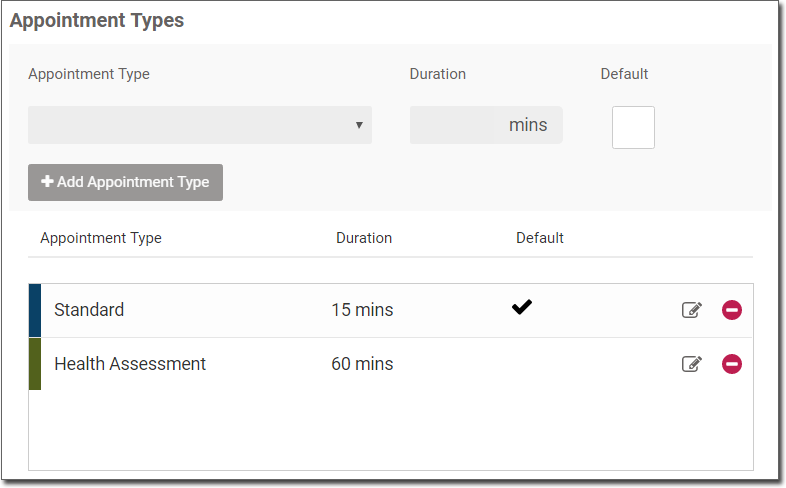
5. Click to confirm the changes.
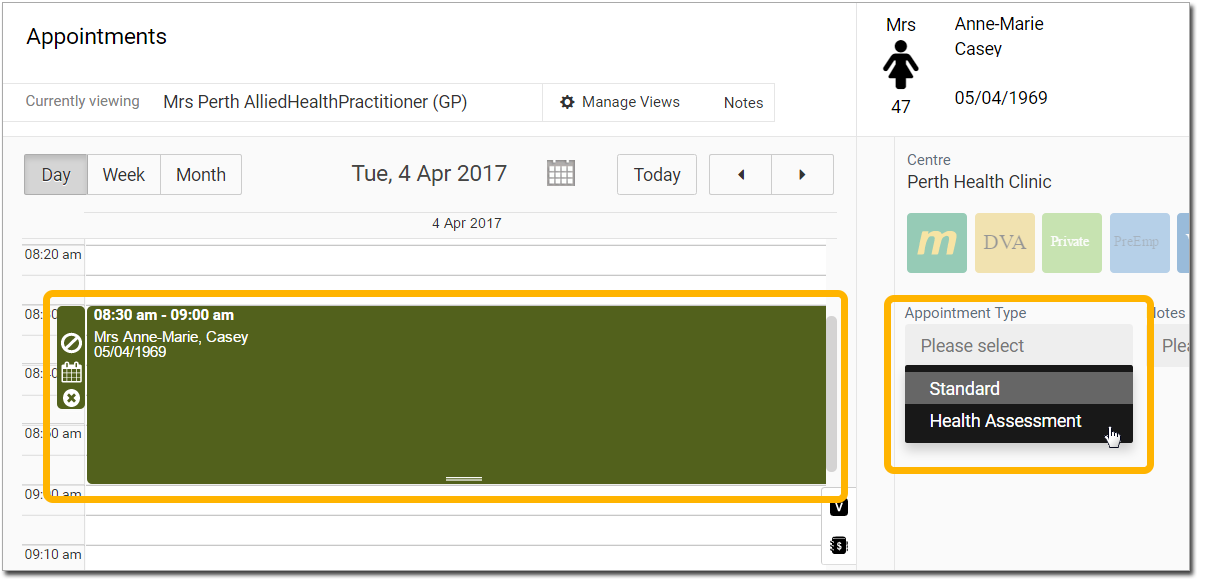
Selecting an Appointment Type when Scheduling an Appointment
When you schedule an appointment for a patient, you can specify the type of appointment the patient is attending.
o If you change the appointment type, and then save the appointment, the appointment's duration (as shown in the left-hand panel) will change automatically to suit.
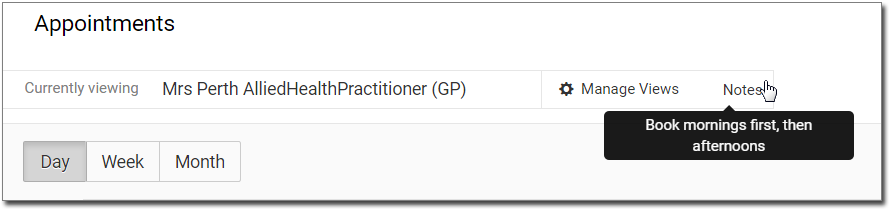
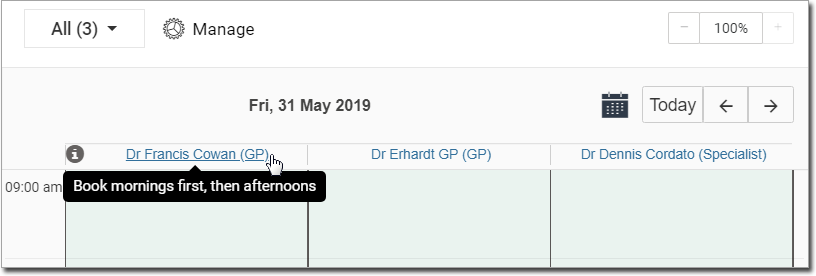
Schedule Notes
You can record notes about a HCP's schedule. These notes are then visible from the Appointment Book.
For example, you may wish to indicate that for a given schedule the HCP would prefer to consult in the morning, and leave the afternoons free. For another schedule, you may wish to indicate that, although the HCP is available until 5:00pm, they won't accept any fit-in appointments after 3:00pm
1. Ensure you are viewing the Appointment Book settings for the HCP whose timetable you wish to edit.
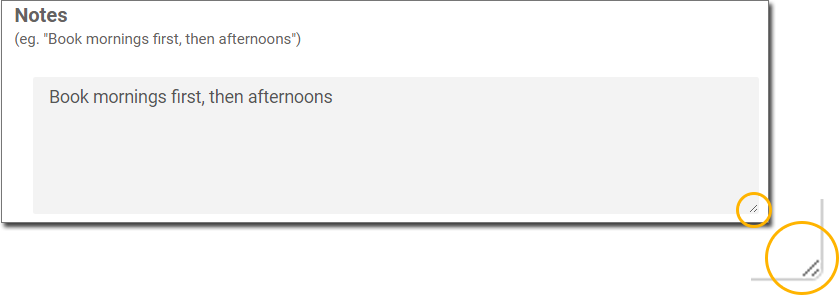
2. Locate the Notes section.
o Enter notes as desired.
o You can expand this field using the grab handle located at the bottom-right.
3. Click to confirm the changes.
You can view these notes by hovering your mouse over the  icon in the Appointment Book.