Telehealth Appointment Type
The Telehealth appointment type needs to be configured prior to use. To setup the Telehealth appointment type, follow these steps:
1. Login as an Admin user
2. Locate
and click ![]() at the lower-left.
at the lower-left.
3. Select the Settings option.
4. Within
Settings click 
The Appointment Book Set-up
window appears.
5. Select
Telehealth from the Appointment Type
drop down, add duration, and then click 

6. The appointment type is now setup for that HCP. You will need to repeat this for all HCPs who will be using this appointment type.

To create a Telehealth appointment, follow these steps:
(for more-detailed steps, see Telehealth Appointments)
1. Create an appointment
2. Select
“Telehealth” in the “Appointment Type” drop down

6
3. Select
“Create appointment” button to create a Telehealth appointment.
Once the appointment has been created, a phone icon will appear
in the appointment card and the appointment type “Telehealth”
will appear in the hover:

When the patient is added to the queue, a label “Telehealth” will
also appear in the queue:

Accessing and Viewing Appointment Schedules
Before you can view the appointment schedule for a given practitioner, you must ensure it has first been configured.
1. Click
 to access the patient queue and appointments.
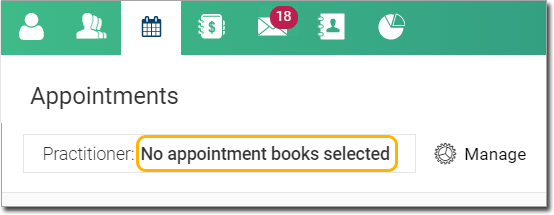
2. Click
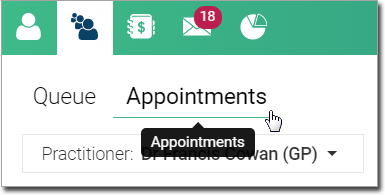
o The
Appointments module appears. When you initially open the Appointments
module, there will not be any appointment books selected. You
must select one or more practitioners to view schedules for. Proceed
to Step 3 for instructions.
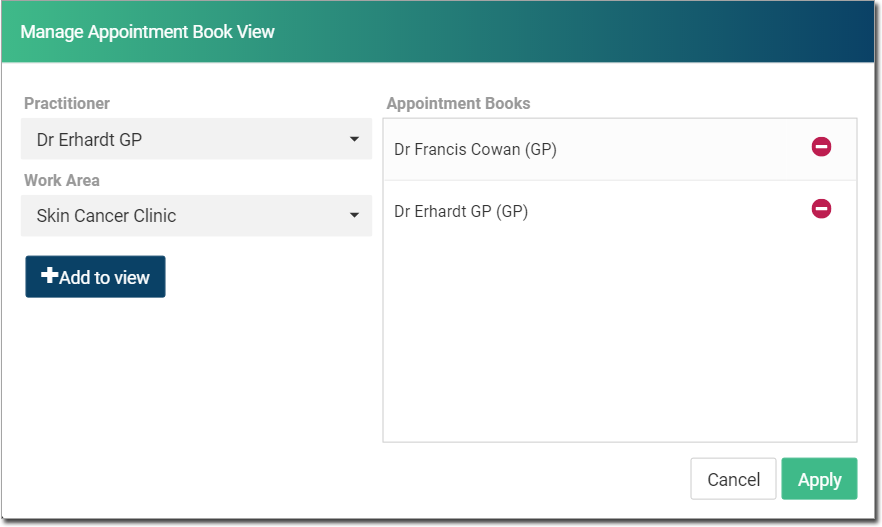
3. Click  The
Manage Appointment Book View
window appears.
The
Manage Appointment Book View
window appears.
![]()
4. Via the Practitioner drop-down list, select the first practitioner you wish to view a schedule for.
5. Via the Work Area drop-down list, select the practitioner's work area you wish to view a schedule for.
6. Click
 to add the selected practitioner/work area
schedule to the Appointment Books
list.
to add the selected practitioner/work area
schedule to the Appointment Books
list.
o Repeat Steps 4-6 to add more practitioner schedules as desired.
o If
you wish to view the schedules for all the different Work Areas
a specific practitioner is responsible for, simply add them to
the Appointment Books list, one at a time.
7. When
you have added all the appointment schedules you wish to view,
click  You
are returned to the Appointments module.
You
are returned to the Appointments module.
o By default, the appointments module will display the schedule of every practitioner you selected in steps 4-6.
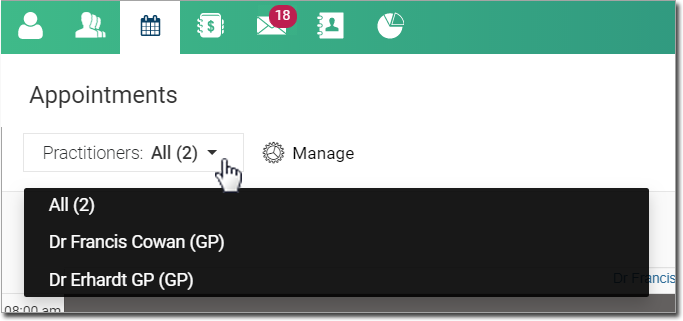
• Click the drop-down list (shown
below) to select individual practitioners if desired.
Viewing a Single Schedule
In the following example we chose to display a single schedule. Notes about this view follow below.
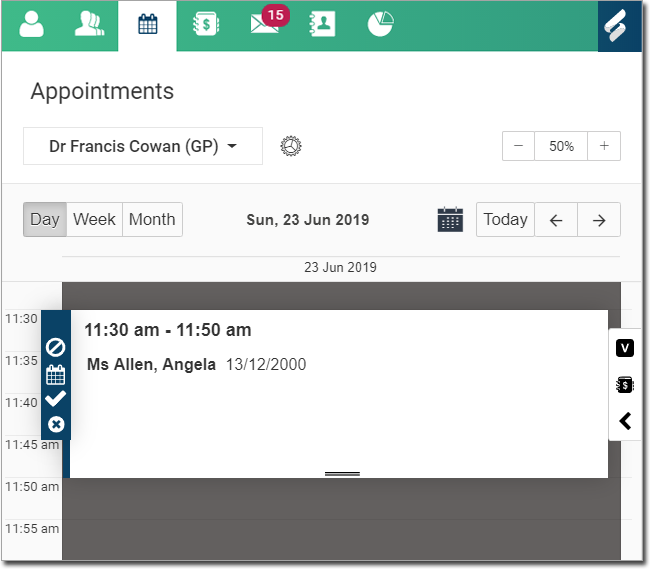
o When
viewing a single schedule, you can switch views between Day, Week,
and Month.  The default view is 'Day'.
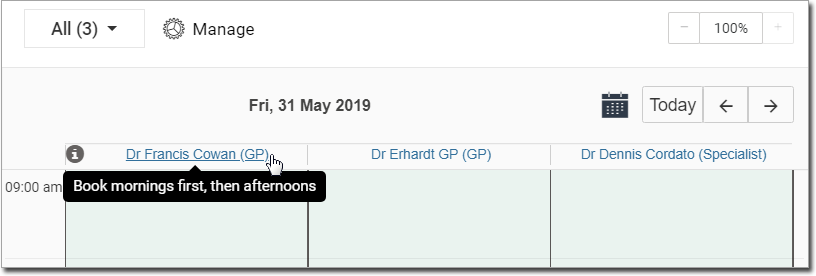
Viewing Multiple Schedules Simultaneously
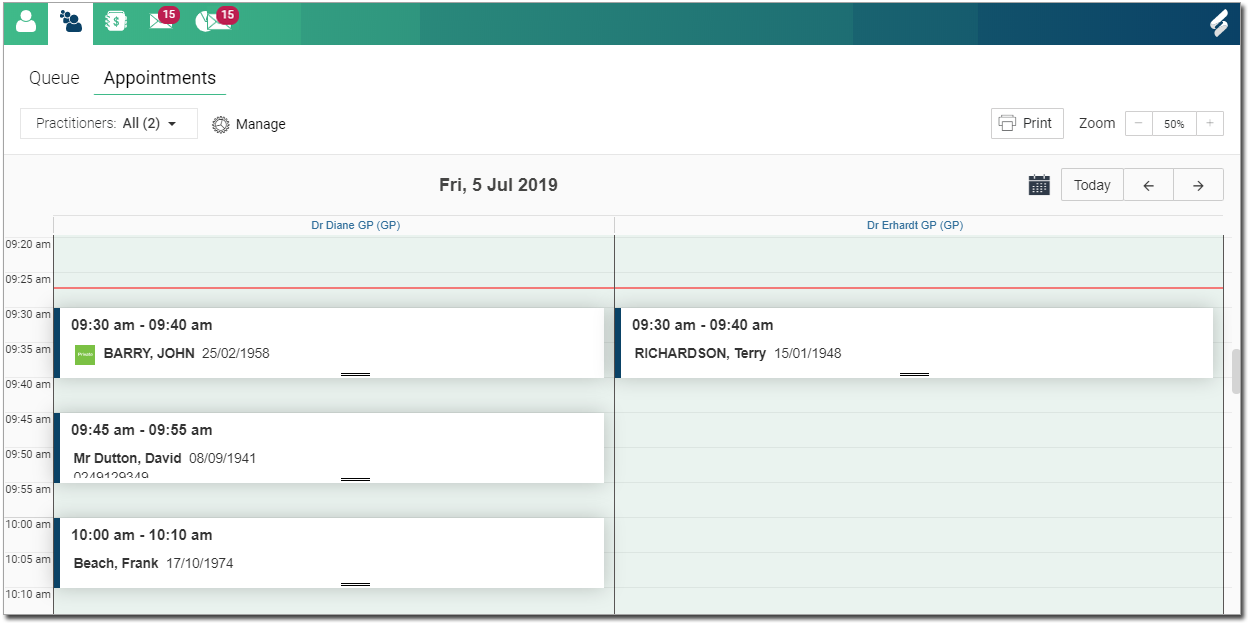
In the following example, we chose to display the schedules for practitioners Perth and Cowan, simultaneously. Notes about this view follow below.

o The names of each practitioner and their associated work group appears at the top of each column.
o When
viewing multiple schedules simultaneously, you can fit a maximum
of 7 schedules across the screen. Additional schedules can be
viewed by clicking ![]() to the right of the window, as shown below.
to the right of the window, as shown below.
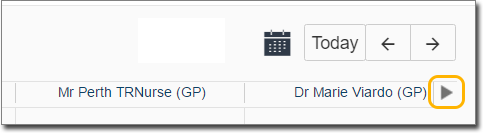
o When viewing multiple schedules simultaneously, only a single day's schedule is available.
• You
can still navigate to other days via 
• Jump
back to the current day via 
o When viewing multiple schedules simultaneously, you can view any notes recorded for a given schedule by hovering your mouse over the column header.
• Schedule notes are recorded via Appointment Book Settings.
Viewing Future Appointments
Helix allows you to view Future Appointments for a patient. Any User role that can see the clinical side should be able to see the future appointment.
Future appointment icon is shown on the Patient Information Header. The number of future appointments is displayed in brackets
Clicking on the icon shows a drop-down that shows the future appointments.
.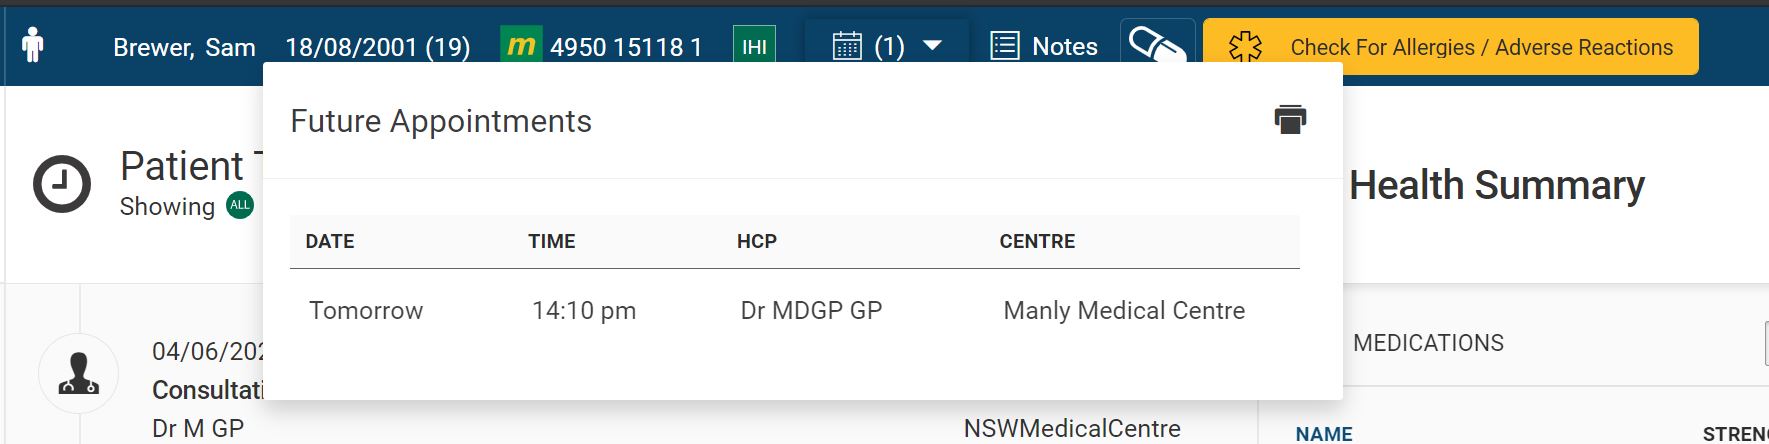
Click on the Print icon to print the list of future appointments.

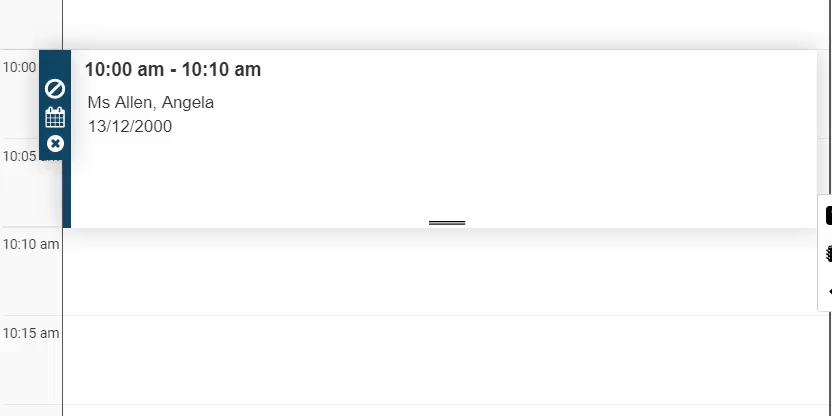
Appointment Book Buttons and Functions
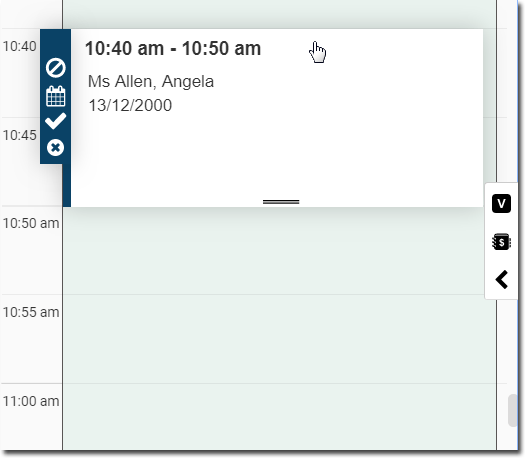
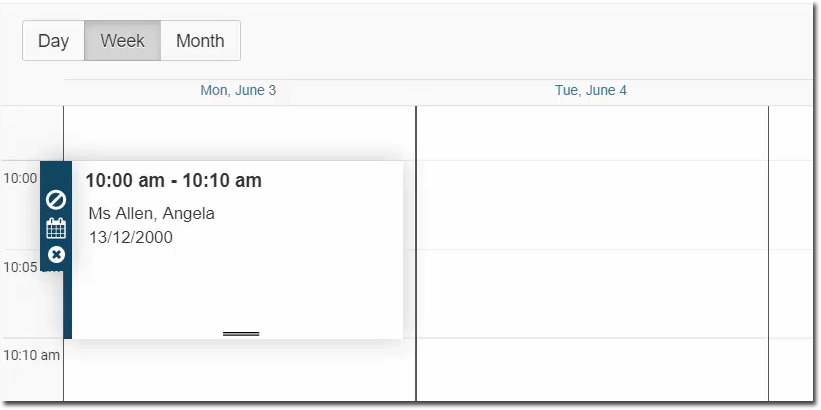
o Double-click an appointment to view the appointment's details, including basic information about the patient. You can make and save edits from here.
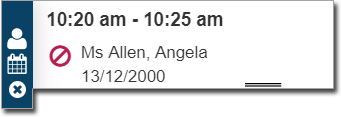
o Single-click an appointment to access the following options:
|
Patient did not attend. After
selecting this option, the If
the patient does eventually show, you can click |
|
View appointment details. Same as double-clicking the appointment to access its details. |
|
|
|
Permanently delete the appointment. |

 to put the appointment back
into a 'booked' state.
to put the appointment back
into a 'booked' state.


Create an Appointment for an Existing Patient
o This procedure is for patients who are already in your database.
o In the following example, the appointment book displays a single schedule for a single practitioner. If you have configured your appointment book to show multiple schedules simultaneously, the steps below may not reflect exactly what you see on your screen.
1. Open the Appointment Book.
o If
you open the Appointment Book, and there are no schedules visible,
click to view one or more appointment schedules.
See Step 3 (above) for information
about configuring schedule views.

2. Select either 'Day' view or 'Week' view to locate an available time slot.
o Note
that 'Month' view is also available, but cannot be used to record
appointments.
3. Locate
and double-click a time slot in which to record the appointment.
The Create Appointment
window appears.
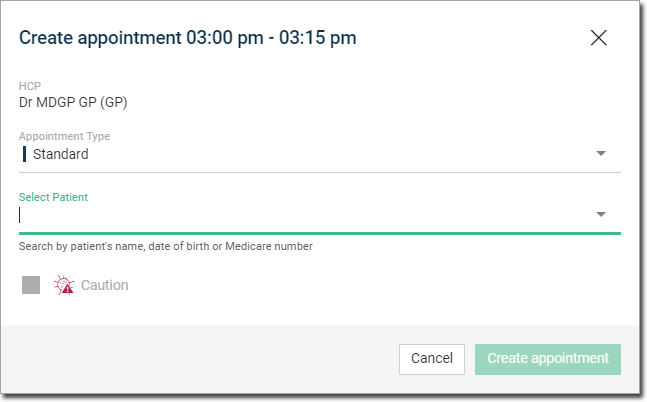
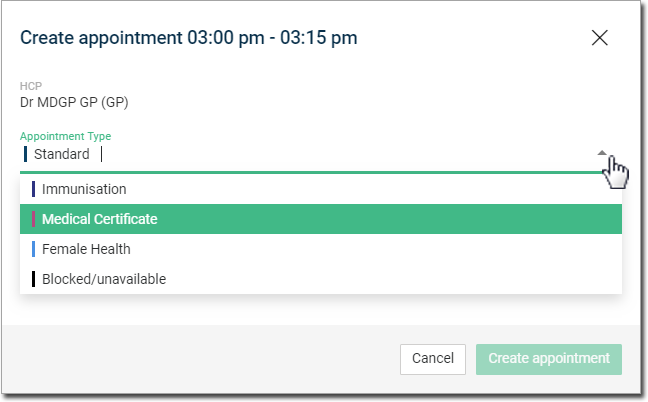
4. Select
an appointment type.
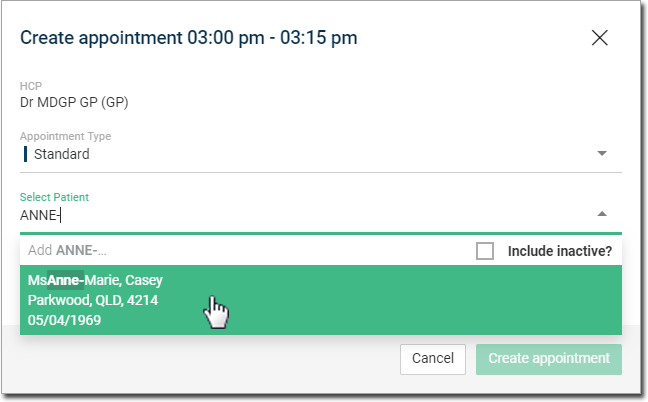
5. Select the patient.
o You can type the patient's name, date of birth, or Medicare number. As you type, Helix displays matching records. Click a patient's name to create an appointment for them.
o If
this list if large, you may have to scroll down it to locate all
records.
6. (Optional)
Tick the Caution check
box to flag the appointment with a "Caution"
label to warn administration staff and practitioners to check
the Notes for more information on the patient. The flag can be
added or removed whilst in the appointment book and queue in the
details screen.
7. Click
 A new appointment is
created, and the appointment details panel is displayed to the
right.
A new appointment is
created, and the appointment details panel is displayed to the
right.
o The
patient's demographic details can be edited from here by clicking

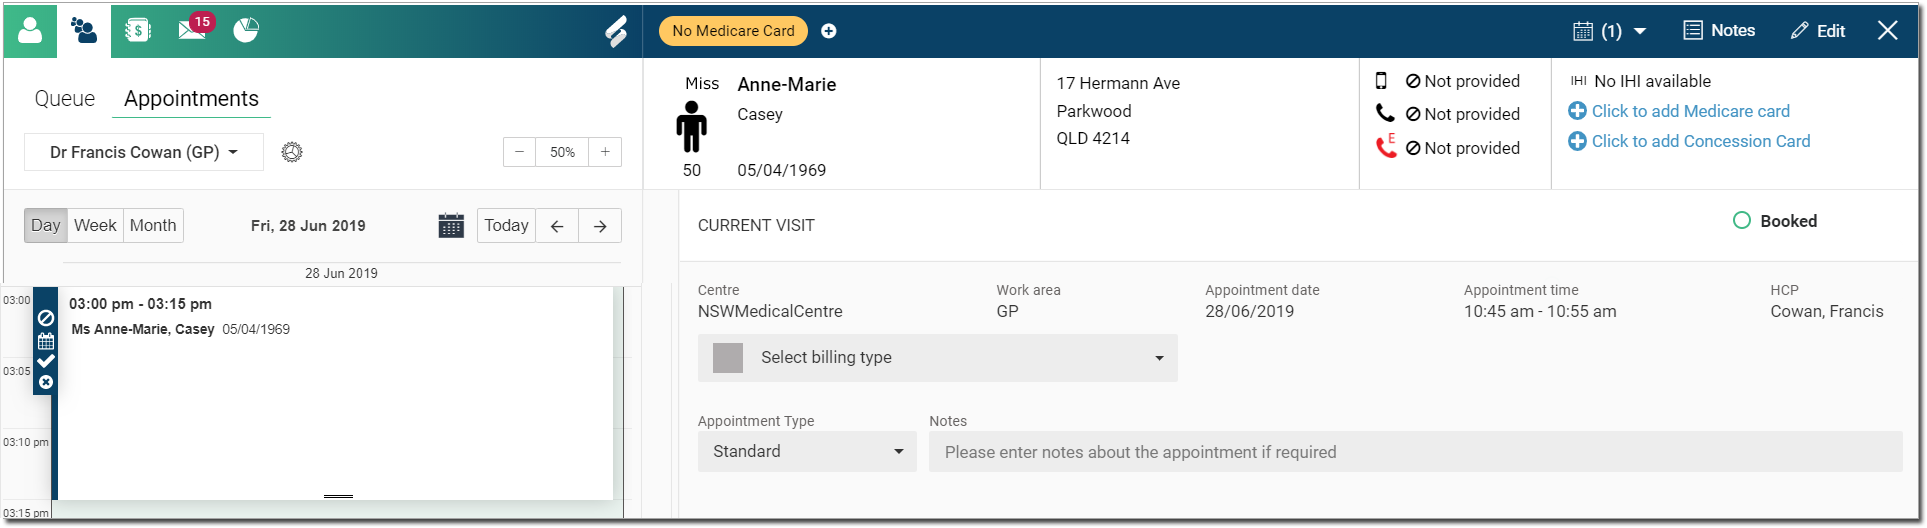
7. Select
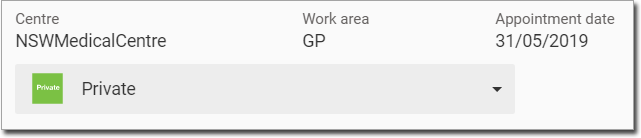
the patient’s concession details. In our example (below), we have
selected 'Private'.
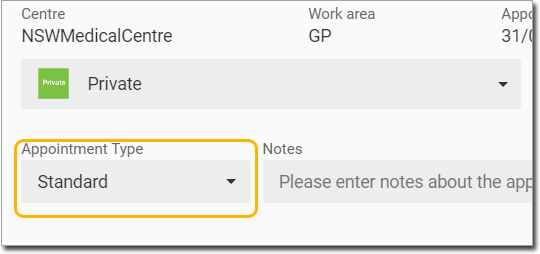
8. Via the Appointment Type drop-down menu, indicate the type of appointment.
o You can indicate which appointment types are available to each practitioner.
9. Add
notes if desired.
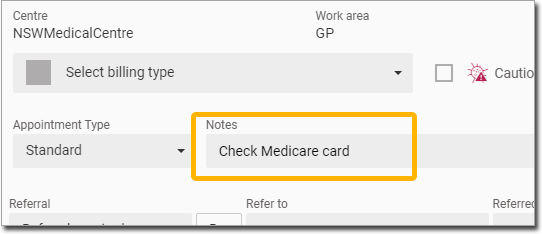
Notes entered here are visible by holding your mouse over the appointment,
as shown below...
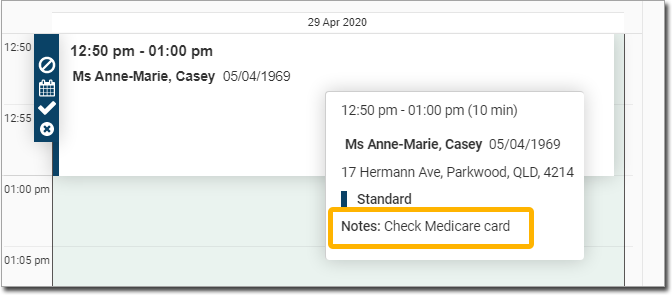
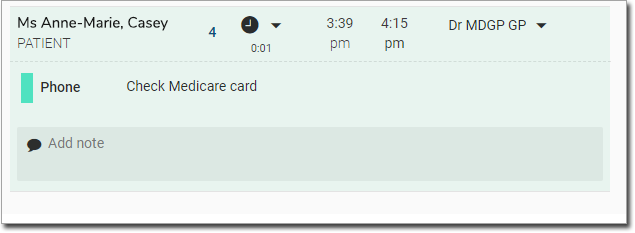
...and in the patient queue.
10. Click
 The appointment is
saved in the Appointments panel.
The appointment is
saved in the Appointments panel.
o Note that the appointment displays the appointment time, the patient's basic details and contact details, and the concession type ('Private' in our example).
Create an Appointment for a New Patient
o This procedure is for patients who are already in your database.
o In the following example, the appointment book displays a single schedule for a single practitioner. If you have configured your appointment book to show multiple schedules simultaneously, the steps below may not reflect exactly what you see on your screen.
1. Open the Appointment Book.
o If
you open the Appointment Book, and there are no schedules visible,
click to view one or more appointment schedules.
See Step 3 (above) for information
about configuring schedule views.
2. Select either 'Day' view or 'Week' view to locate an available time slot
3. Note that 'Month' view is also available but cannot be used to record appointments.
4. Locate
and double-click a time slot in which to record the appointment.
The Create Appointment
window appears.
5. Select an appointment type.
6. Enter
the patient's name. As you type, Helix displays matching records,
allowing you to confirm that the new patient doesn't
already exist in your database. Because this is a new patient,
simply click to add them to your database, as shown in the example
below.
7. (Optional)
Tick the Caution check
box to flag the appointment with a "Caution"
label to warn administration staff and practitioners to check
the Notes for more information on the patient. The flag can be
added or removed whilst in the appointment book and queue in the
details screen.
8. Click
A new appointment is
created, and the appointment details panel is displayed to the
right.
You can now record a visit for this patient.
Create an Appointment for a Provisional Patient
A provisional patient is one that is unconscious or incapacitated, and unknown to the healthcare facility, or where you otherwise don't have enough information about them to record all the minimum demographic information, but they still need to be attended to. There may be times where you need to create an appointment for such a patient, and Helix provides for this. Note that whilst you can create appointments for these patients, you can't record their visit until you capture more information about them (explained following). This procedure is slightly different to simply creating an appointment for a new patient.
1. Open the Appointment Book.
o If
you open the Appointment Book, and there are no schedules visible,
click to view one or more appointment schedules.
See Step 3 (above) for information about
configuring schedule views.
2. Select either 'Day' view or 'Week' view to locate an available time slot.
o Note that 'Month' view is also available but cannot be used to record appointments.
o Locate
and double-click a time slot in which to record the appointment.
The Create Appointment
window appears.
3. Select
an appointment type.
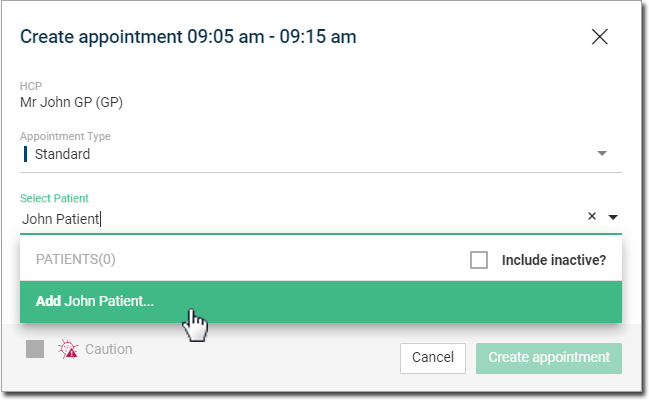
4. Type
the patient's name, and Add
them.
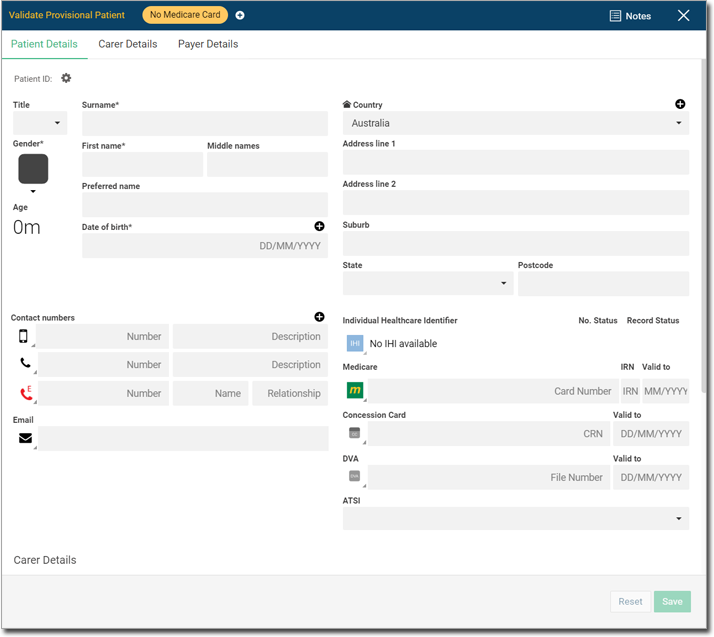
5. The Validate Provisional Patient form appears.
o It
is recommended that you capture as much information as possible
at this time. The normal minimum includes Gender, Surname, First
Name, Date of Birth, and one Contact Number. However, if you are
unable to record the minimum information required by this window,
click  to close
this window. You will be prompted that the record is incomplete,
but you can ignore this warning, because a provisional patient
record will be created. for you. Continue now to Step 7.
to close
this window. You will be prompted that the record is incomplete,
but you can ignore this warning, because a provisional patient
record will be created. for you. Continue now to Step 7.
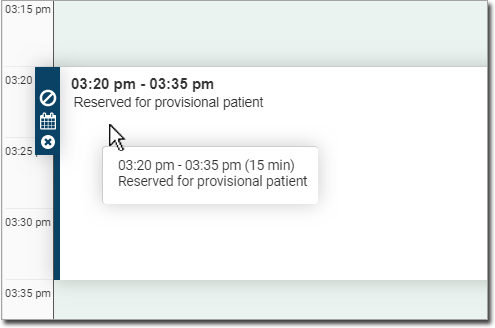
6. The
appointment is scheduled, indicating that it is for a provisional
patient.
7. When the provisional patient arrives for their appointment, they must be validated before a visit can be created. Locate and double-click their appointment. The Patient Details window appears.
8. Click  Any
fields in the Patient Details window requiring your input will
be flagged, after which you can record
a visit for this patient.
Any
fields in the Patient Details window requiring your input will
be flagged, after which you can record
a visit for this patient.
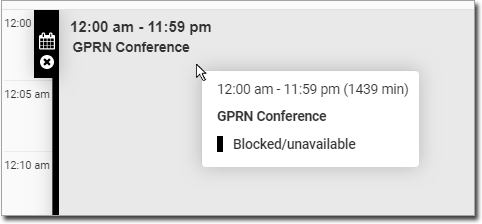
Create a Blocked / Unavailable Appointment
Helix allows you to block off appointment sessions so that they are not available for patient visits. You may wish to block sessions in order to indicate where a doctor is away at a conference, or where staff training is being delivered, for example.
1. Open the Appointment Book.
o If
you open the Appointment Book, and there are no schedules visible,
click to view one or more appointment schedules.
See Step 3 (above) for information about
configuring schedule views.
2. Select either 'Day' view or 'Week' view to locate an available time slot.
o Note that 'Month' view is also available but cannot be used to record appointments.
3. Locate and double-click a time slot in which to record the appointment.
o For an all-day event, simply double-click anywhere on the day of the event - the actual time is irrelevant.
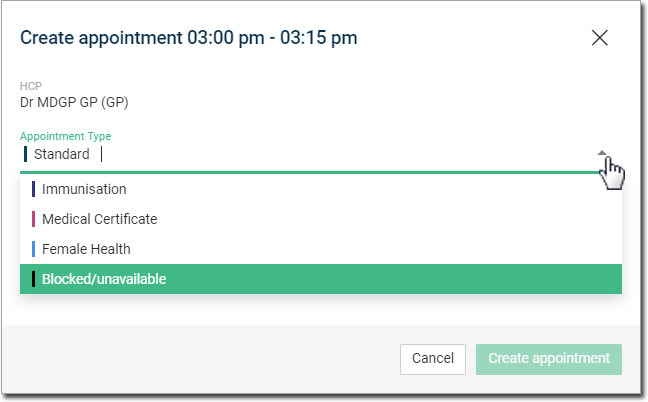
4. The
Create Appointment window
appears. Select the
appointment type of 'Blocked/Unavailable'.
5. Record
details about the blocked appointment session.
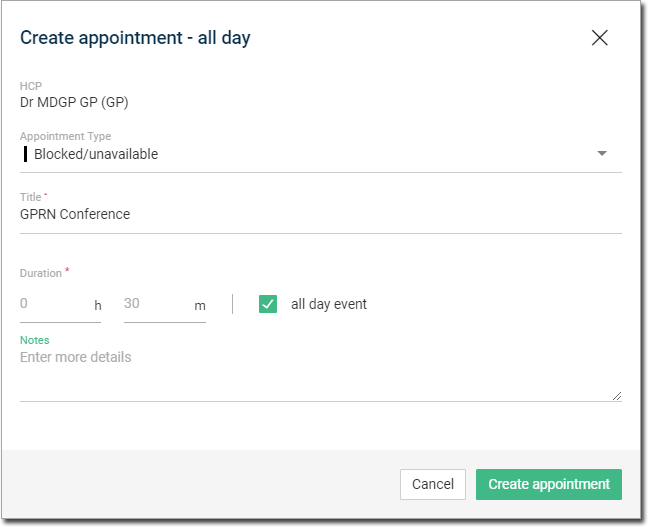
6. Click
A new appointment is
created.
Change an Appointment's Time
To move an appointment to a different time slot, click and hold the appointment header, and then drag it up or down to the new slot.
You can also move an appointment to a different day, by switching first to Week view.
Change an Appointment's Duration
To change the duration of an appointment, click and hold the grab-handle at the bottom of the appointment session, and then drag it up or down to decrease/increase the duration.
o An appointment's duration must be a multiple of the practitioner's default appointment duration. For example, if the practitioner's default is 10 minutes, then the appointment length can be 10 minutes, or 20 minutes, or 30 minutes etc.
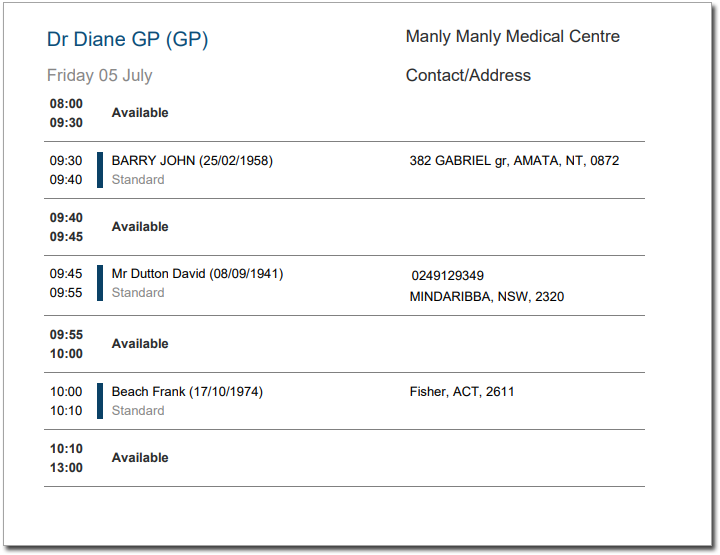
Printing an Appointment List
Print the appointment list for each day from the Appointment screen.
1. Open the Appointment
Book. Click 
2. The
print appointment list window appears with the HCPs listed.

3. The HCPs get selected by default based on the appointment book view and if they have any appointments. You can either uncheck the HCP if not required or choose 'Select All' option to print all appointment for all HCPs. In the above example both the HCPs Dr Diane and Dr Erhardt have appointments and hence the HCPs are chosen by default.
4. Click
 to print the appointment
list.
to print the appointment
list.
5. The
appointment list prints as shown below.