Overview
1. Within the patient's record,
locate and click  to
call the Consult panel.
to
call the Consult panel.
2. Within
the Consult panel, locate and click 
o It
may be necessary to click  to reveal the Measurements button.
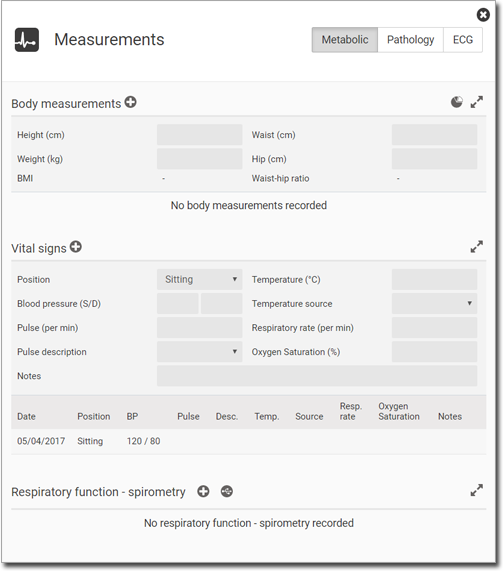
3. The Measurements panel appears
o The Metabolic measurements panel is split into 3 sections; Body Measurements, Vital Signs, and Respiratory Function – Spirometry. By default the Metabolic information is displayed.
o The Pathology measurements panel is split into 4 sections: Cholesterol, Blood Glucose, INR, and Renal.
o The ECG measurements panel allows you to import data from an ECG device.
o BMI data can be recorded via the Measurements module (see below), or via the BMI module, and changes made in either module are immediately reflected in the other.
|
Expand / Contract each section to show/hide data within it. |
|
Displays a chart of the data within the given section. Not available to all data sets. |
|
Access a connected device to capture readings from. |
|
Adds a new row of data. |
|
Deletes a row of data. Rows of data can only be deleted on the same day on which they are initially recorded. |


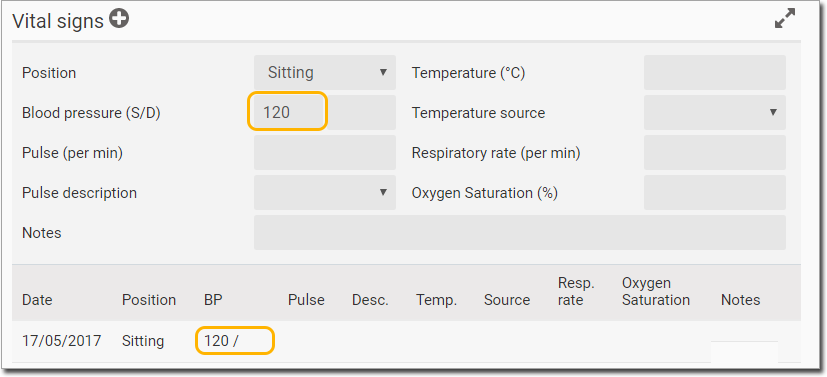
4. Enter data into the fields.
o If the value is outside the range, a message is displayed, and the box is highlighted.
o As
data is entered, and a new field selected, the data is added to
a row in the history.
o When
 is selected in the INR
section (within Pathology), the New Dose from the previous
entry becomes the Current Dose for this entry.
is selected in the INR
section (within Pathology), the New Dose from the previous
entry becomes the Current Dose for this entry.
o If a patient’s blood pressure and weight measurements are entered into the Measurements panel, these values are displayed in the Obstetrics panel. Likewise, if weight or blood pressure is entered in the Obstetrics panel, they are displayed in the Measurements panel.
o In the Renal section, the GFR value is calculated and added only if the weight value (Body Measurements) and the creatinine value (Renal) are entered. If no weight has been recorded for this patient, then a message 'Weight Required' is displayed in the GFR field.
Measurements Using Shortcuts
You can add measurements data directly into the Consult window
by typing keyboard shortcuts.
1. Within the patient's record,
locate and click to
call the Consult panel.
2. Click within the Consult panel to add your insert point. In our example below, we clicked within the History section.
3. Type \ to call the shortcut menu.
o You
can follow the \ character with letters to filter the list of
result. For example, we typed "\bp" to call Blood Pressure
shortcuts.
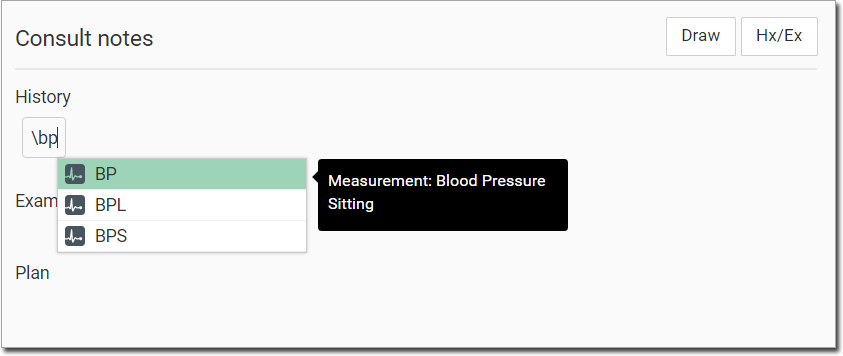
4. Select
the module you wish to access. We selected the first option, "BP".
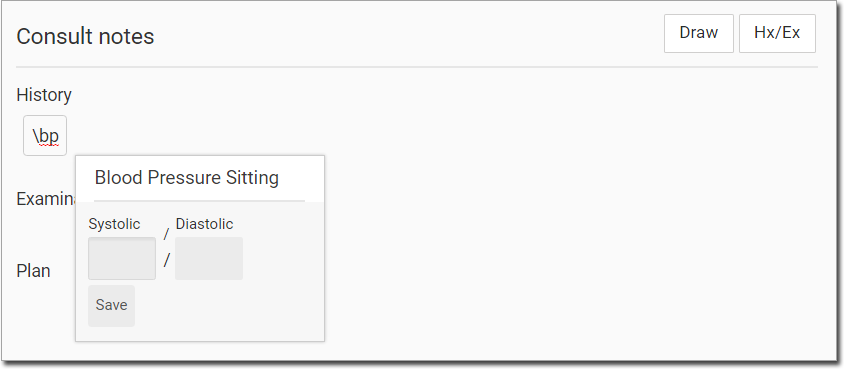
5. Enter values as desired.
6. Click
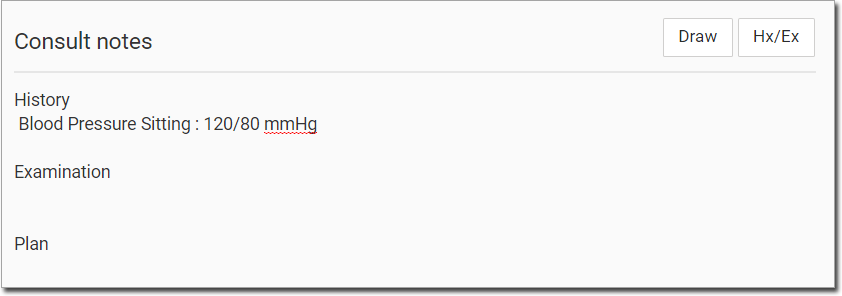
 Your data is
added to the consult.
Your data is
added to the consult.
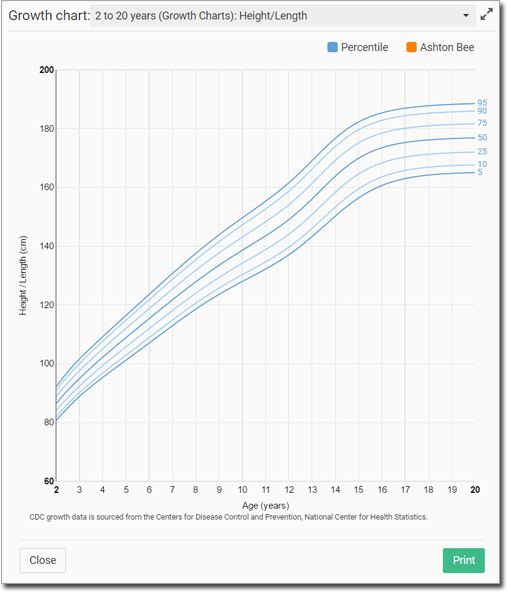
Measurement Charts
Some charts are available for viewing data over time.
Where a chart is available, a  button will
be presented, as shown in the Body Measurements example below.
button will
be presented, as shown in the Body Measurements example below.
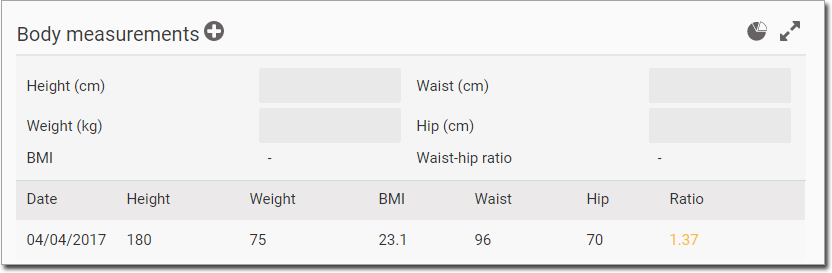
Click to display the associated chart.
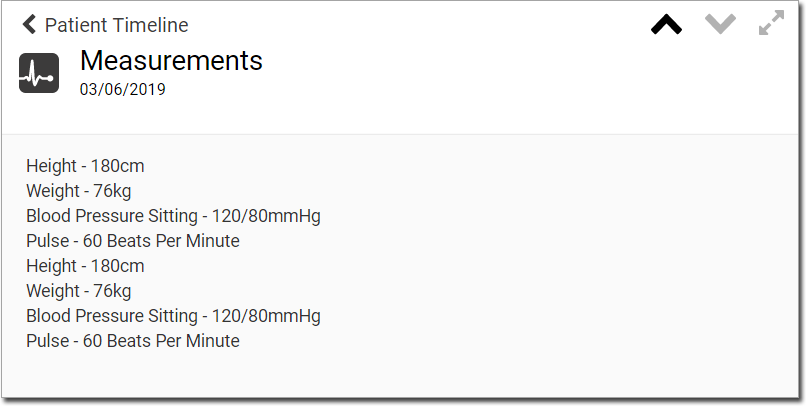
Measurements in the Actions Section
Measurements data captured during a consult is displayed in the Actions section of the patient's record.