About User Defined Fields and Field Prompt Sets
Generally, Letter Writer Fields are based on data taken from the patient and user databases, or ancillary information like today's date for example. When you have exhausted the range of fields available from the Data Toolbar, you can create your own customised or 'user-defined' fields.
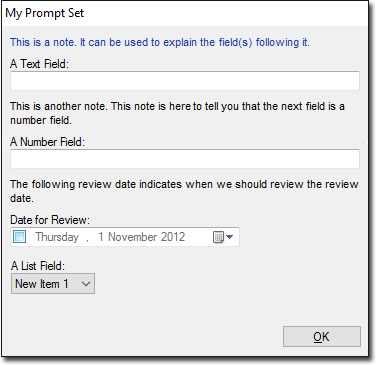
When such user-defined fields are added to a template and then a letter based on that template is created, any user-defined fields within it will prompt you for input. You can also create a user-defined field prompt set. A set of user-defined field prompts appears a questionnaire window; you complete the questionnaire, after which the information you entered is added to the letter. Prompt sets include features that are not available to individual user-defined fields, such as:
o You can indicate that each field within the set of prompts is compulsory.
o You can add notes to the set of prompts to inform users of what information is required for each field.
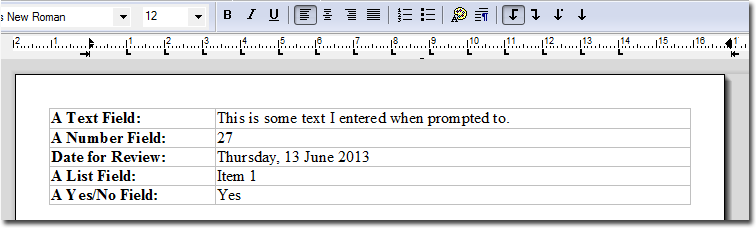
o After responding to a set of prompts, the data you enter appears within a table in the letter.
Note that user-defined fields have an association with the template in which they are created, and are not available to other templates. In other words, although you might create a user-defined field that shares its name with that from another template, the two fields are considered separate entities.


Create a User-Defined Prompt Set for a Template
1. Ensure you are working within a new or existing template.
2. Ensure that the Data Toolbar is visible. The Data Toolbar can be enabled/disabled by pressing Ctrl+D.
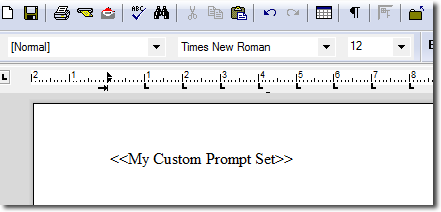
3. Position the cursor in your document where you wish to insert the User-Defined Prompt field (this is where you want the text to eventually appear on the page).
4. Locate and double-click the User Defined template field from the Data Toolbar. The Custom Field Properties window appears.
5. From the Field Type drop-down list, select Prompt.
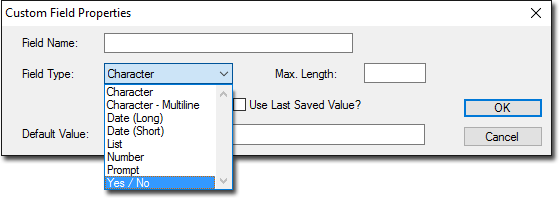
6. The Custom Field Properties window will now display settings for the custom prompt.
It is with this window that you create a set of custom fields that make up your prompt. For example, your custom prompt might consist of a single question with an associated text field for users to enter their response, or it could be made up of a series of different questions with different user input mechanisms.
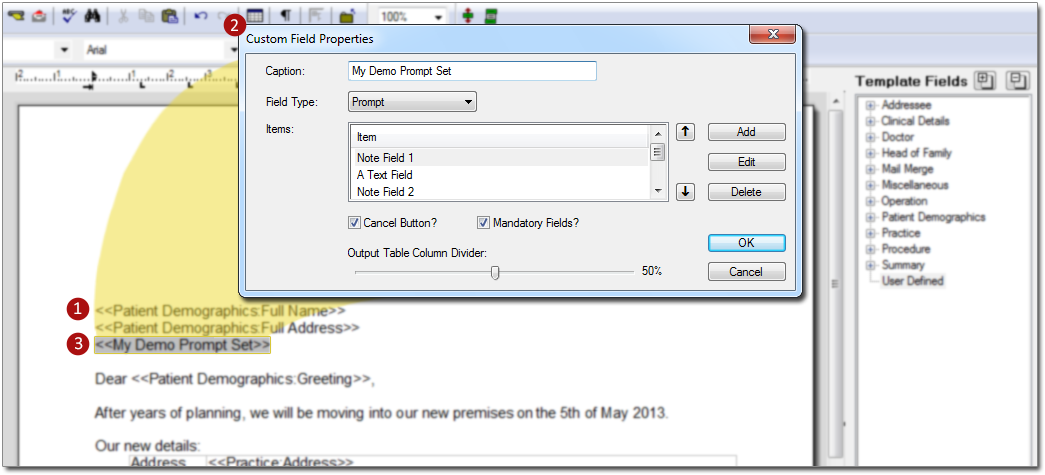
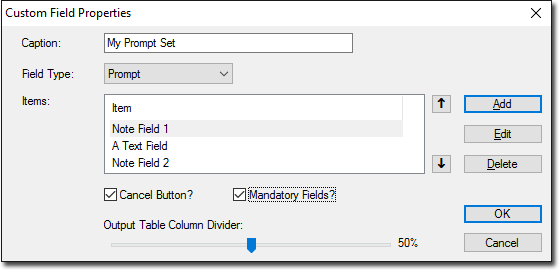
7. Enter a name for your custom prompt set in the Caption field.
8. Add custom field items to your custom prompt set. To do this, click Add The Custom Field Properties window appears again.
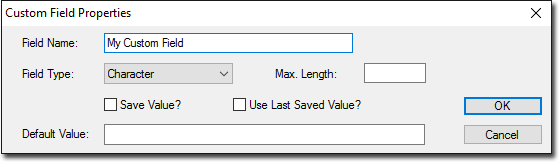
Normally you would use this window to add a custom field to your letter template. This time however, you use this window to add a custom field to your prompt set. See User-Defined Fields for more information about creating individual custom fields.
Add as many custom fields to your custom prompt set as required. The following field types are available:
|
Field Type |
Description |
|
Character |
|
|
Character Multiline |
|
|
Date (Long) |
|
|
Date (Short) |
|
|
Fixed Note |
|
|
List |
|
|
Number |
|
|
Yes/No |
|
|
Prompt |
9. (Optional)
o Add a Cancel button to your custom prompt by ticking the associated checkbox on the Custom Field Properties window.
o To ensure that all fields are mandatory, tick the associated checkbox on the Custom Field Properties window.
10. (Optional) Re-size the Output Table Column Divider using the associated slider on the Custom Field Properties window.
When your custom prompt set is used in a letter, the user's responses to your prompts are displayed in the letter in a table with two columns; column 1 contains the prompt questions and column 2 contains the user's responses. The Output Table Column Divider is the divider between these two columns in the output table. The default setting is 50%. This can be altered manually once the resulting table of data appears in your letter.
11. Click  to save your custom prompt set settings and add the custom prompt set to your template.
If you wish to edit this custom prompt set after you have added it to a template, right-click the custom prompt set placeholder and select Properties from the menu that appears.
12. Remember to save this template
13. When you create a new letter based on this template, you will be prompted to enter data for your User-Defined set of fields, as shown below.
The resulting table of data: